
So, many people talk about putting HIDs in to standard headlights. This is not ideal at all, as HID require a focussed lens to produce the best light.
HIDs in normal housing spray light everywhere, blinding oncoming drivers.
The method mentioned below is pilfered from www.ozvr4.com and a member named Naughtika. He has done a heap of these for members and knows exactly what he is doing.
The projectors are from The Retrofit Source, more specifically these.
I hope this gives people some ideas for better headlights than just slapping HIDs in to standard housings/lenses.
How to do a MINI H1 Projector Headlight
Pre-Installation Check
Check if your Oven is big enough to fit 1 headlight assembly
Check if your headlight is suitable enough for the install - eg.. cracks, scratches & etc..
Check if your projector modules are both RHD, specifically setup for your road use
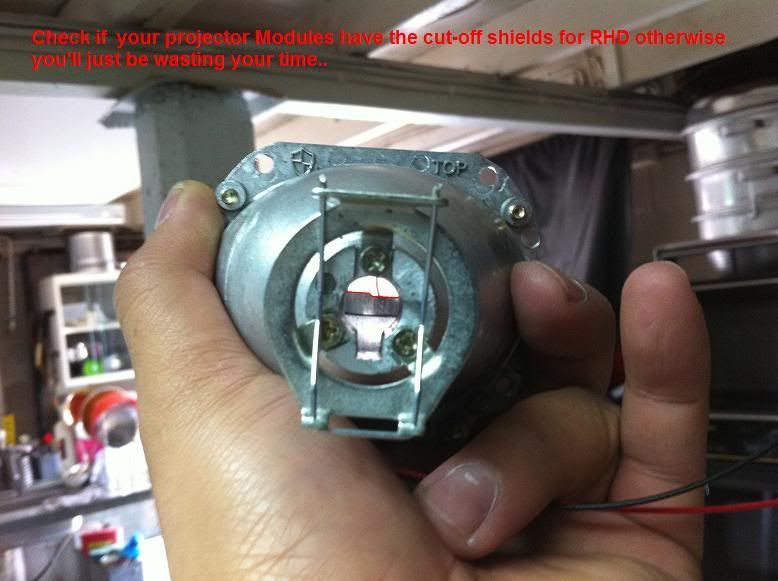
Check if you have all the necessary tools and accessories to complete the project.
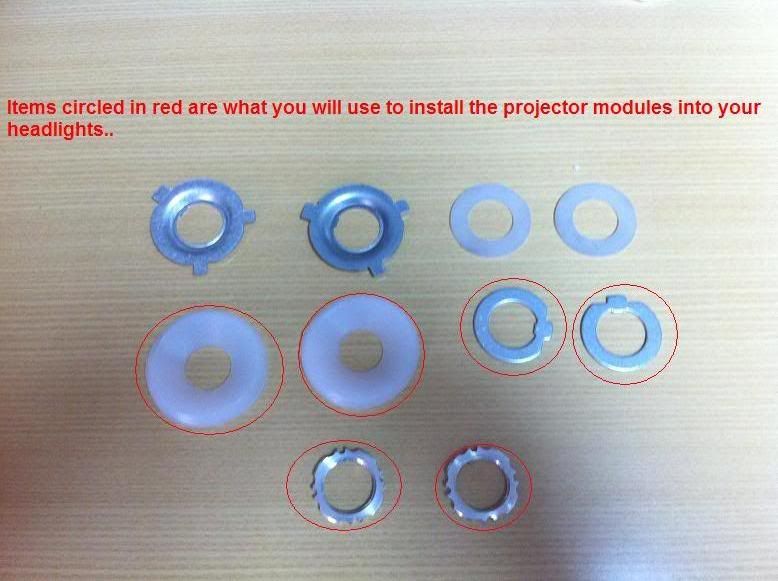
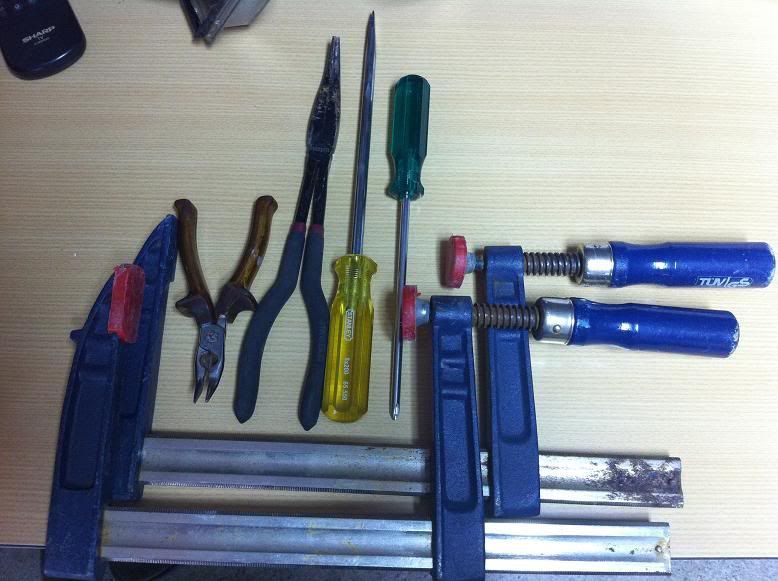
Tools needed..
1x long nose pliers
1x + screw driver
1x - screw driver (preferably one with a wide head - for prying)
2x Big 'C' Clamps
1x egg timer or timer app from your mobile phone
Pair of Leather Gloves - TIG Welding Gloves are preferred as its thick but soft enough so you can move your fingers easily..
Accessories included with the Projector Modules
2x H7 Adaptor
2x H4 Adaptors (not needed)
2x Big Silicon Washer
2x Thin Silicon Washer
2x Aluminum Nut
2x Bulb Holder Clip (Installed in the Module)
2x Bulb Holder (Installed in the Module)
6x Bulb Holder's Screws (Installed in the Module)
Now you are Ready to proceed with this project
1. remove your headlights from your car..
2. remove all the bulbs and connectors currently installed (dont worry about the park bulb wire as its there permanently)
3. put the headlight assembly in the oven.. BUT BEFORE YOU DO.. Do these following check ups..
4. after pre-heat, put your headlight in the oven for approximately 3-5 minutes @ approximately 140* Celcius - this way the headlight assembly wont melt or lose its shape..
5. Keeping in mind the tabs on the lens cover and assembly.. lift this up slightly, enough so that it wont be in any way damage while you're performing step 6.
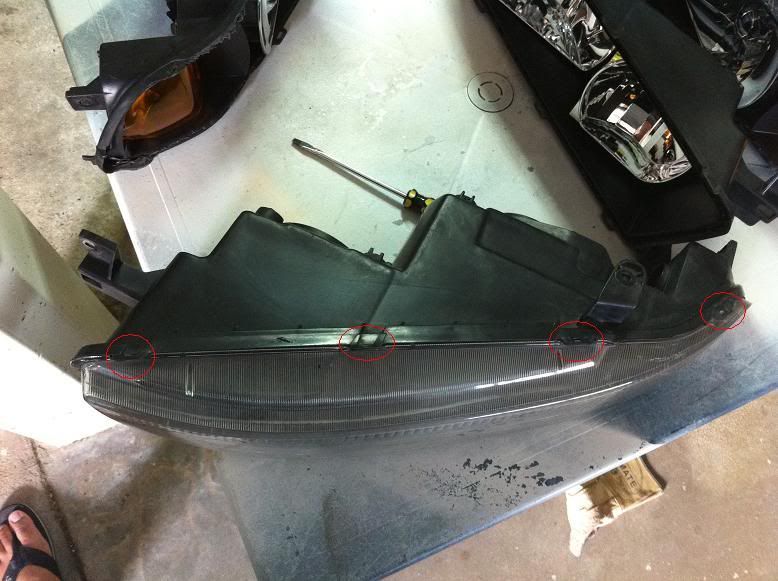
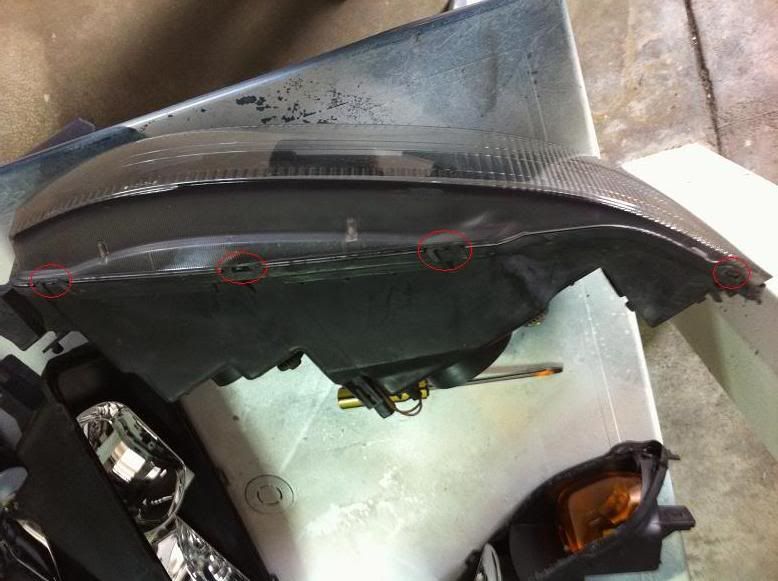
6. after heating the headlight, remove it and put it on your work bench and start to pull the lens cover way from the assembly..
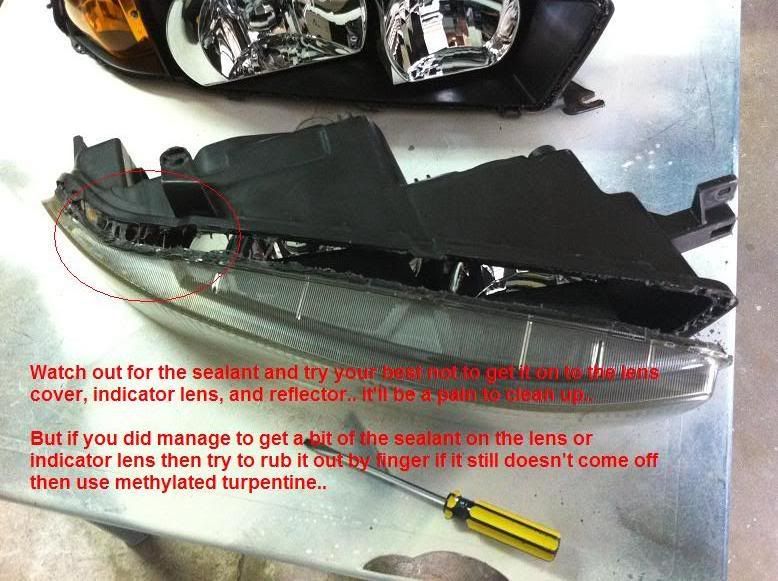
*NOTE* try to make sure that the sealant don't touch the good part of the lens cover as well as the reflectors otherwise it'll be a PITA to remove..
7. Once you have removed the lens cover, start to pull out the rear facing reflector, so you can insert the projector module in place.. you can do this by removing the screws holding the park light's bulb holder, then once you've removed it you can secure the park light's bulb holder back
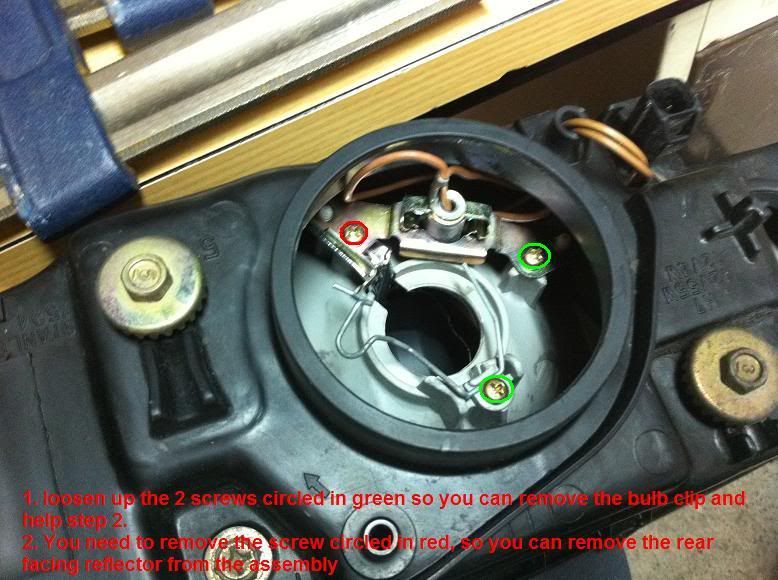
these are what you need to remove so you can install the module into the housing..
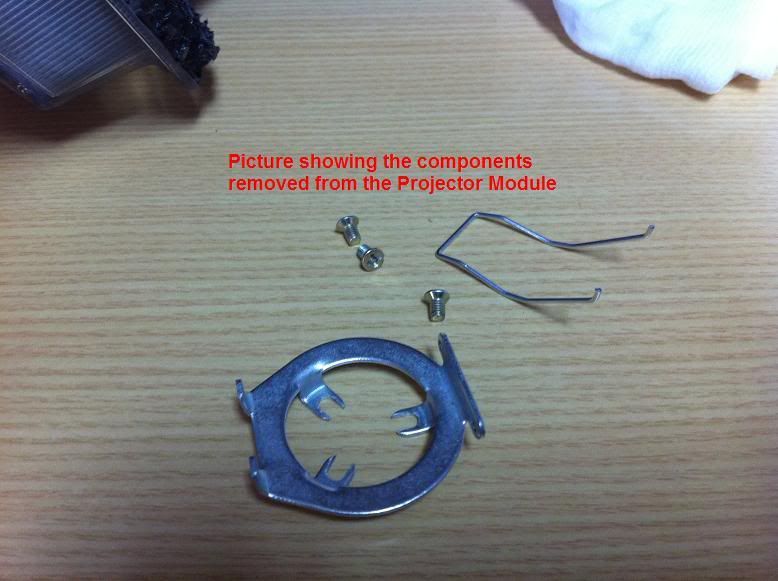
At this stage you are now ready to install the projector module into your headlight's factory housing..
8. Insert the silicon washer (included in the kit) onto the back of the projector module, then insert the module into the factory housing.. keep in mind of the bi-xenon's solenoid cable, insert that first if you wish to use it or otherwise cut it off..
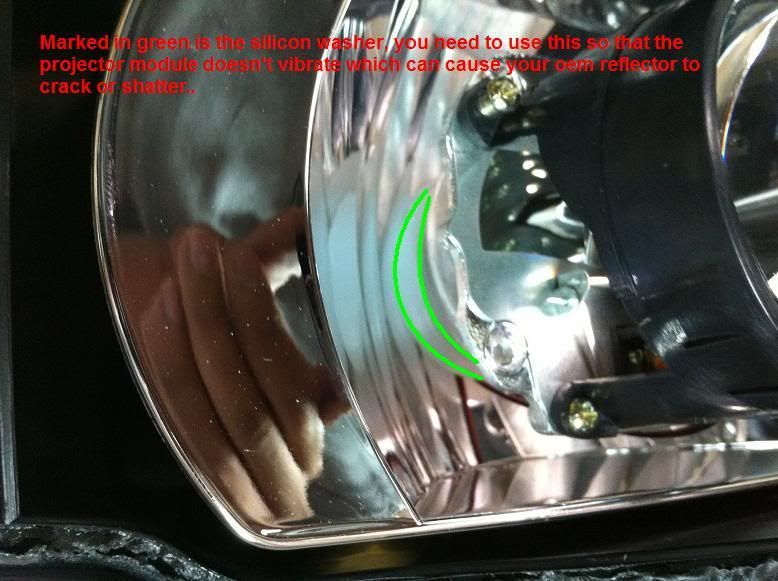
9. Secure the projector module by using the adaptor washer and the ring nut provided.. use whichever adaptor that you need - either H4 or H7
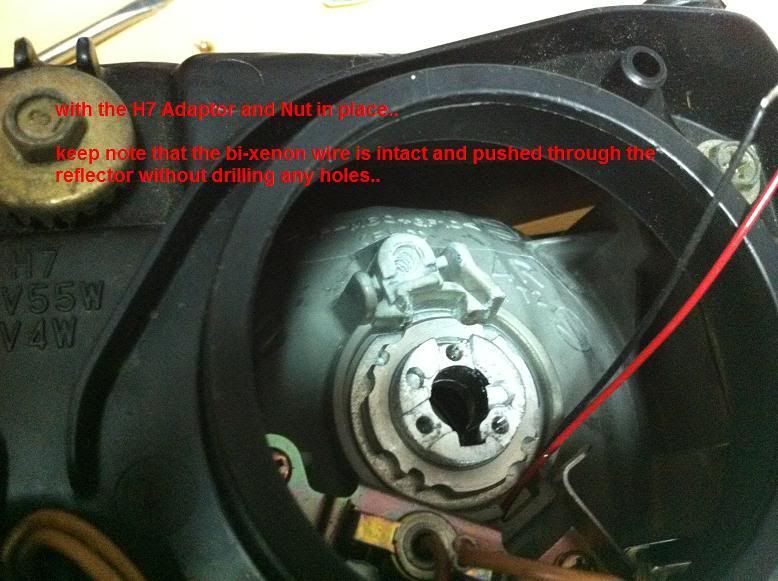
10. Before fully locking the nut, make sure that your projector is aligned properly, rotate to either direction if needed.. then fully lock it - you need a bit of force but not too much otherwise you will break the reflector..
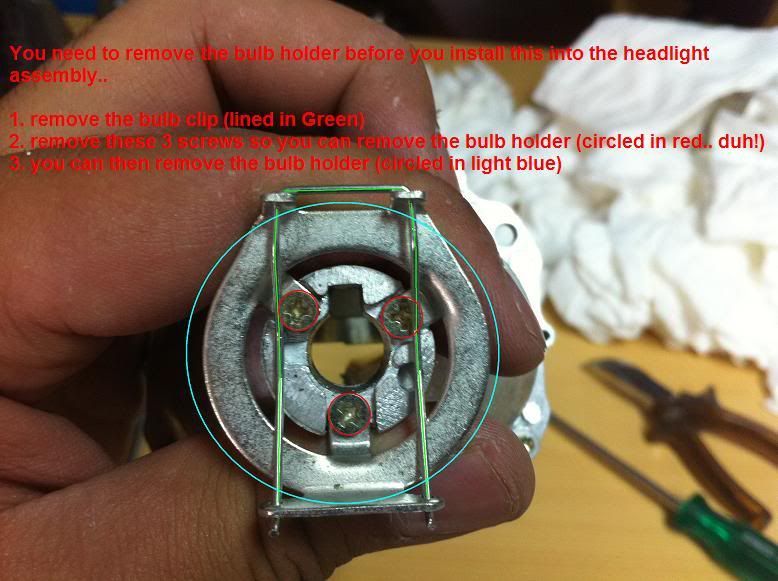
11. Mount the bulb holder by using 3 screws provided, then insert the H1 hid bulb that you have selected or included in the kit. After this you can secure the bulb by using the clip provided.. should be installed like in the picture below
12. plug in the hid bulb with your hid ballast and test..
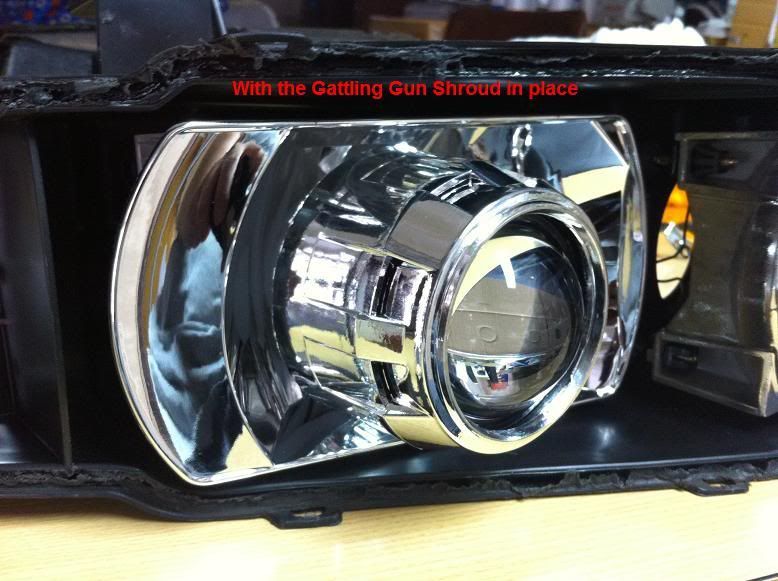
13. Insert the Shroud that came with the Projector Modules - as pictured below
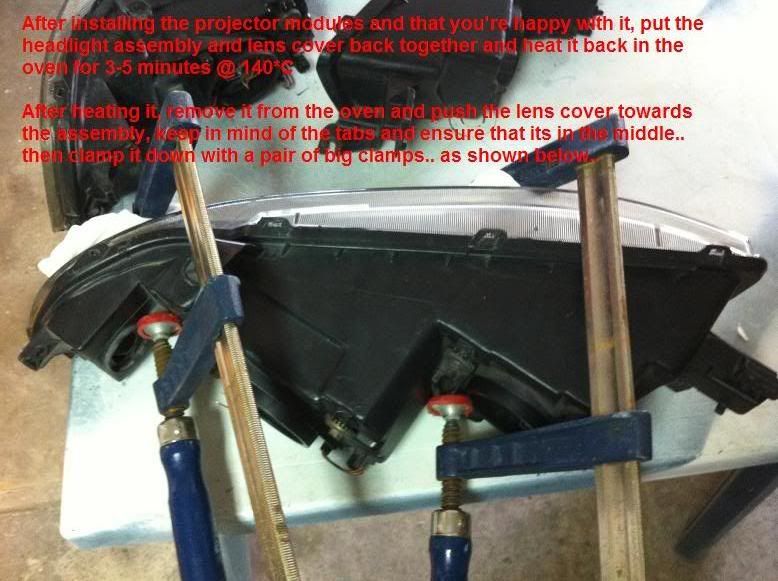
14. Once happy put the lens cover back on (clean it first if you need to) and put it back in the oven for another 3-5 minutes @ 140*C
15. After heating it, remove the headlight from the oven and further push in the lens on to the assembly and secure it by using couple of 'C' Clamps and let it cool down for about 10-30 minutes.. again keep in mind of the tabs so they don't break/snap *note* I used rags to dampen the clamps as well as to not scratch the lens..
16. Re-check your work in case you have missed something.. then install it back..
17. Enjoy!


