There has been a bit of interest in this so i thought i would start a seperate thread so it will come up in the search
when i was looking into this i couldn't' find any good pics of coily clips ant wt bonnets so here we go
coily clip on a leafy
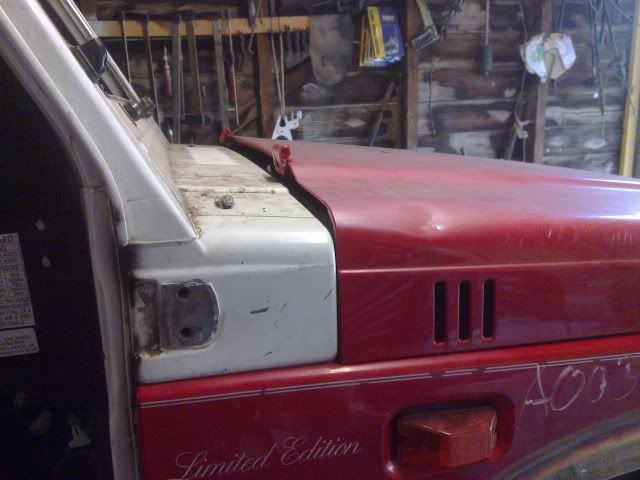
leafy bonnet on a coily clip
i was expecting this so i took the grinder when i went to pic up the clip
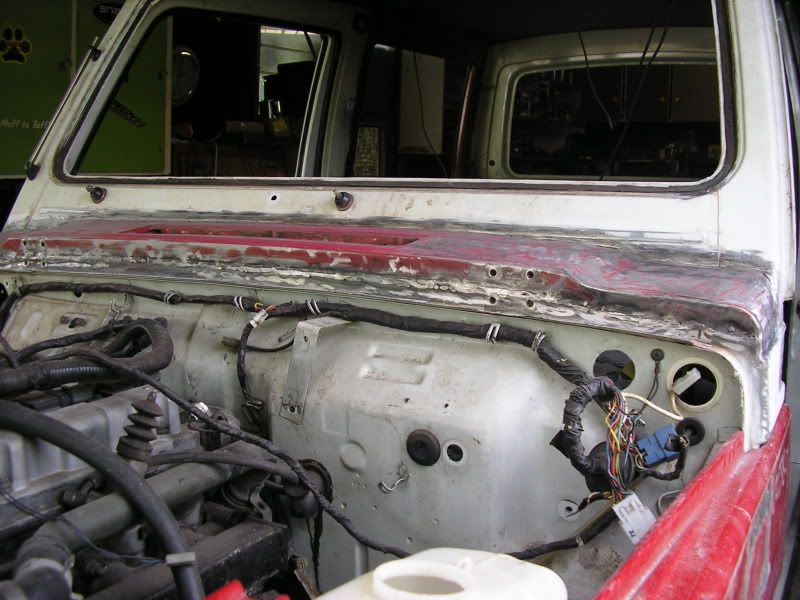
i cut the coily cab through the window pillars, across the fire wall and just below the top door hinge with the idea of unpicking the outer skin at the windscreen and top of fire wall meaning that the cutting and joining would be just the little bit through the outer layer of the windscreen pillar and behind the guards to be hidden by the clip itself
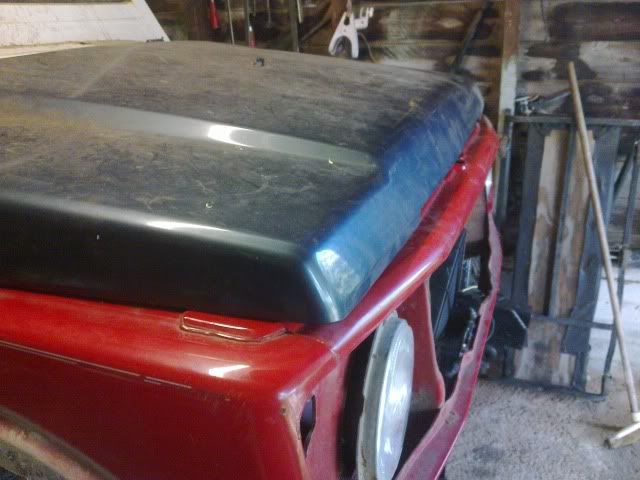
This would have been the idea except after getting it home and cleaning up the windscreen rubber area i found the doner cab had a bit of rust where mine was very clean. i could have continued on and done a rust repair at the same time but as ive only ever been half heated about the coily rounded section rising up to the windscreen as the radius of that section is a lot bigger than anything else on the body so i decided to graft the two together and give it a squarer look like a leafy.

you can see the height difference between the 2 sets of bonnet hinge bolts.
now,... to make this work the section of body in front of the top door hinge had to be reshaped and stretched to match the bonnet.
the coily section was massaged to a shape that blended the two together on the sides rising up to the windscreen.
Then a couple of days to beat, fill and finish ready for paint... so going to a coily front probably cost me 4-5 days.
Then came the heater plumbing. there is 3 basic bits of plumbing to the heater.
1. The bit that bolts to the under side of the red section i just welded in.
2. the housing that holds the fresh/recirculate air flap. this also houses the evaporator on a coily.
3. the heater box.
so i used (1) and (2) from the coily and (3) seemed to be the same between the coily and leafy so the leafy was retained.
to get (2) to fit i had to cut off 1 of the mounting brackets so that it would fit the leafy fire wall.
the passenger side drain pipe is a lot smaller than the standard leafy pipe so the coily pipe was used and a new hole drilled in the firewall.
the drivers side drain pipe, while roughly the same size was an oval shape not round like the leafy so i cut both in half and urethane the two together to make an adapter hose.
i think thats about it. just be very carefull when welding the section in. making sure that the clip is fitted and aligned before hand as the exact location of this section will determine how the bonnet will look when its finished.[/quote]