| Author |
Message |
Jackson

Joined: Mon Apr 04, 2011 5:56 am Posts: 559 Location: Newcastle
Vehicle: Yellow Ute

|
 Posted: Sun Nov 25, 2012 11:01 am |
|
|
Hi,
So on the weekend a mate an I went to a dent repair/painting lesson run by some ex panel beaters. They give us a sheet with the general procedure which I thought would be good to share.
Dent Repair:
So depending on the filler it may be suitable to put straight over primer/paint in which case sand the area with 150 grit and apply the filler.
If the filler says it only adheres to bare metal then sand back to bare metal (they used an orbital sander with 36 grit, took about 2 seconds).
Clean up with wax and grease remover ***DO NOT USE THINNERS***.
Sand area with 120 grit to smooth area and smooth the edges of the repair.
Mix up the filler ***A tip was to never use cardboard to mix the filler up on, it can draw out the hardener and get cardboard fibres in the filler***
Apply the filler and fill over the dent, build it up a little then feather the edges, he did this with the corner of the applicator kind of like putting a chamfer all the way around.
Use a cheese file if it is a large repair, use this before the filler sets properly or it will be too hard for the file.
Use 80 grit paper with a block, the bigger the repair the bigger the block. Be sure to rub down to the required shape of the panel.
Use 120 grit to remover any 80 grit scratches.
Finally use 240 grit.
PRO SANDING TIPS.
When sanding never go across the top of a curve but at 45 degrees from one way then the other.
Do little strokes then slightly longer then slightly longer again to avoid creating edges.
Painting:
For the painting they only did acrylic. For the DIY jobs they reckon acrylic is the go, unless you can hire a spray booth, because 2 pack is harmful to your health and takes a longer time to dry so if left outside it will catch a lot of dust.
Clean with wax and grease remover.
Spray 2-3 coats of etch primer mixed at 1:1 with thinners. Wait 10 minutes between coats.
For any areas where you used filler:
Prepare some spray putty, mix with 20% thinners.
Using a 3.5mm gun apply 3 coats, 10 minutes between coats.
Before it dries spray on a light guide coat, using black paint.
Leave to dry for 24 hours.
Rub down with 240 grit using a block. Be sure to sand out all the black and smooth/feather the edges.
Clean with wax and grease remover.
Using acrylic primer or etch primer spray 2-3 coats over the spray putty. 10 minutes between coats.
Again spray on a guide coat.
Leave for 24 hours.
Rub down with 600 grit wet and dry. Making sure to sand off the guide coat.
Using scotch brite grey and some "scuff it" or whatever rub down the whole panel. Can also use 800 grit wet and dry.
Clean with wax and grease remover.
PRO TIPS.
When masking up stick the paper down then fold the paper over the tape. This will give you a soft edge instead of a hard edge in the middle of a panel. Mask up to an existing line of crease to camouflage edges.
Be sure to rub down all edges, creases and seams, otherwise the clear coat will lift off and peel.
Mix the acrylic paint at a ratio of 60:40 thinners to paint. ***This was a little bit debated on the day between the two blokes, one was taught 50:50 other was taught 60:40)***
Clean with wax and grease remover and wipe with a tack rag.
Apply 3 coats of colour, 10 minutes between each coat. ***if you are just fixing one dent try to blend across the panel, each coat make the area you are spraying slightly bigger also never finish blending at the edge of a panel as you may see the colour difference.
Prepare the clear coat, 1:1 with thinners and within an hour of spraying on the colour apply 3-4 coats, 10 minutes between each coat.
After a couple of days cut and buff (this is where any orange peel is removed).
MORE PRO TIPS;
Gravity feed spray guns are easier to use.
1.8-2mm nozzle for acrylic. 1.4mm for 2pack and enamel.
3.5mm nozzle for spray putty.
Spraying at 40 PSI is good.
You want a hand span fan when the gun is a hand span away from the work.
When spraying overlap each pass about half way, aim the nozzle at the bottom of the last pass.
Hold the gun about 20 cm from the job.
When starting out screw the fluid nozzle in to restrict paint flow a little.
Paint in the shade.
Acrylic thinners give a better gloss then multi thinners.
Admittedly there is no substitute for practice but to know the process is good.
This was at VG auto paints in Sydney, completely free to go to and run once a month, while it was all demonstration and no hands on I felt it was worth it.
|
|
|
|
|
Mike57
az supporter


Joined: Fri Jul 22, 2011 11:09 am Posts: 1009 Location: Melbourne
Vehicle: Suzuki Jimny 2009
|
Posted: Sun Nov 25, 2012 1:43 pm |
|
|
Excellent info Jackson. Thanks for taking the time to write this up.
|
|
|
|
|
bh59
Joined: Wed Jun 20, 2012 10:05 am Posts: 21
Vehicle: sj 50t
|
Posted: Tue Nov 27, 2012 12:18 pm |
|
|
you said the A word.... Acrylic
a cheap 2 pack would be 100x better than acrylic bro
but then again you get what you pay for
my shop uses debeer paints and we havent had any trouble with their HS (high solid) range, their solid colours are great also
try not to mix up your products, use say, debeer primer, debeer thinners, debeer paint, debeer harders, etc etc...
as for bogs, id go the evercoat rage gold as a first choice as it adheers well to painted surfaces (no bare metal stripping), but we have been having good results with the upol ranges such as flyweight gold and 'fantastic'
pm me if you have any other questions
|
|
|
|
|
tonyevans
az supporter

Joined: Sun Jan 16, 2011 11:18 pm Posts: 1998 Location: Lightning Ridge NSW
Vehicle: SJ40 - LJ50 - LJ50V - Vitara
|
Posted: Tue Nov 27, 2012 3:43 pm |
|
|
Did you read that at all - He said his reasons for acrylic and he was dead right - This was for DIY and Acrylic is safe and dries faster so that there is less chance of shit sticking to it.
|
|
|
|
|
Benchai

Joined: Fri Aug 06, 2010 12:18 pm Posts: 378 Location: Beaudesert
|
Posted: Tue Nov 27, 2012 5:22 pm |
|
|
You can purchase "iso free" 2 pack which as the name suggests is free of isocyanates and is as ok to use health wise as acrylic. Probably nowhere near as good as PPG, but certainly better than acrylic. Jake's shorty is getting painted in this. 3 litres with hardener is going to set him back $150 so not badly priced either
|
|
|
|
|
tazmanier
Joined: Fri Jun 26, 2009 11:30 pm Posts: 47 Location: gerringong
Vehicle: 89 SWB zuke
|
Posted: Tue Nov 27, 2012 5:33 pm |
|
|
So where does sprey can enamel compare to acrylic and 2 pack? Somewhere in the middle I assume. Is the thinners and hydro carbons used in single part enamel worse for your health than acrylic?
|
|
|
|
|
Zuzukie
Joined: Tue Mar 27, 2012 3:13 pm Posts: 194
Vehicle: 82 1ltr, 93 1.3 with 6.5's
|
Posted: Tue Nov 27, 2012 6:00 pm |
|
|
Iso free clear coat still has isowhatever in it, it still requires the use of a face mask as it can still damage your health
Acrylic can still get the same finish as 2k and if it is damaged is easily repaired due to simple steps
As one of the guys said most old holdens are sprayed with acryllic from factory
Yes the 2k is a harder wearing paint but it all comes down to the preperation
If it is prepared right it will last
Just going from what i was told at this free lesson by the ex panel beater who has been in the trade either repairing or selling paints for 25 years
|
|
|
|
|
matty_wall

Joined: Sun Feb 15, 2009 10:30 pm Posts: 989 Location: Blue Mountains
Vehicle: SJ51T
|
Posted: Tue Nov 27, 2012 7:26 pm |
|
|
I used acrylic for ease of repair and because it was painted in a residential area. Got a finish as good as 2Pak once it was polished.
|
|
|
|
|
Wazz
Joined: Sun Apr 17, 2011 7:27 am Posts: 210 Location: Keilor
Vehicle: 92 tintop sierra
|
Posted: Tue Nov 27, 2012 7:57 pm |
|
I dont see anything mentioned regarding big rust holes? chicken wire and bog or expander foam and bog? 
|
|
|
|
|
Jackson
Joined: Mon Apr 04, 2011 5:56 am Posts: 559 Location: Newcastle
Vehicle: Yellow Ute
|
Posted: Tue Nov 27, 2012 7:59 pm |
|
Wazz wrote: I dont see anything mentioned regarding big rust holes? chicken wire and bog or expander foam and bog? Because this is a legitimate operation sir. 
|
|
|
|
|
Wazz
Joined: Sun Apr 17, 2011 7:27 am Posts: 210 Location: Keilor
Vehicle: 92 tintop sierra
|
Posted: Tue Nov 27, 2012 8:08 pm |
|
HEHE, I did a cert 1 automotive back when i was 17 or so, did acouple weeks with paint. If i remember correctly they were getting us to use acrylic clear with 2pac colour for either tight arse reasons and or health reasons. I got this on the go,I just hand balled it to a mate! He now regrets it hahahah I did warn him. 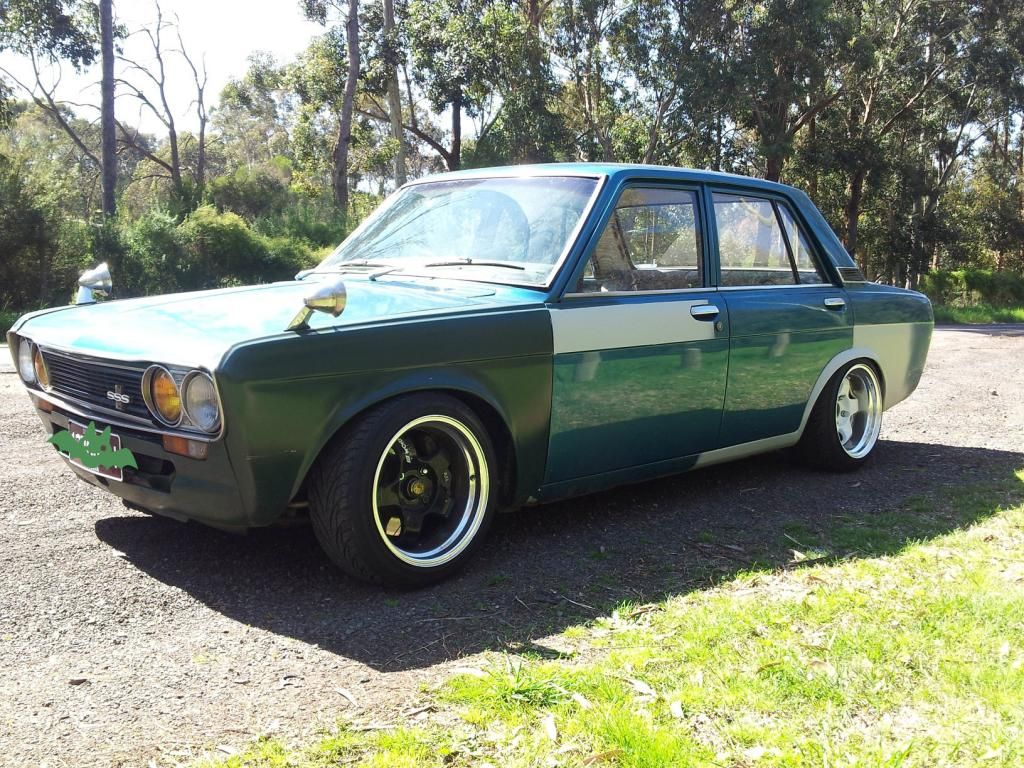
|
|
|
|
|
DarkHorse
az supporter

Joined: Wed Apr 14, 2010 11:30 pm Posts: 5413
Vehicle: 08 SV650
|
Posted: Tue Nov 27, 2012 8:32 pm |
|
OK.... what are peoples thoughts on this:  Haven't seen it in person, just this photo to go by. (The bumper slope is just because of the body lift, not the result of an impact.) I have zero experience in panel work or body painting, so I'm wondering if it's worth having a crack at this myself. I'm thinking with a bit of elbow grease and some bog the crinkle above the wheel arch could be smoothed out, but it's the hole next to the tail light that has me concerned. The ragged edges and bubbling paint make me think it's cancerous, but the question is how far the rust has spread? Would I be able to cut a chunk out, try to follow the folds with a new bit of galv sheet and weld in a patch, smooth the crap out of it then sand/bog/sand/prime/sand/sand/paint/sand/paint/clear/sand/clear?  I don't have the booth or equipment to spray it properly, so it would be a rattle can job - anyone recommend specific products? Or would I be better off taking it to a panel shop and having it done professionally? Or would I be better off running the other way?
|
|
|
|
|
BlueSuzy
az supporter

Joined: Sun May 04, 2008 11:30 pm Posts: 9716 Location: NSW
Vehicle: SJ51 LWB, SJ70 SWB
|
Posted: Tue Nov 27, 2012 10:04 pm |
|
|
I would stay away from that rob..
_________________ BlueSuzy wrote: I'm over the G16b's.
|
|
|
|
|
|


