It is currently Fri Jul 31, 2026 8:46 am
Board index » Talking About Stuff » Suzuki Talk


Post new topic Reply to topic  [ 20 posts ] 
Author Message

Offline
az supporter
az supporter
User avatar

Joined: Tue Oct 06, 2009 10:30 pm
Posts: 1475
Location: melbourne

Post Posted: Tue Feb 22, 2011 9:00 am 
Reply with quote Top  
hey all sorry if this has been covered

but i got some tyres i wanne put on my car and right now money is very tight so insted of going 2 inch lifted springs
im going shackels and bodylift
after when i get more money i will go springs

ok now my problem is i got no idea how to do a body lift.
and all my mates that know how to do it say its very hard blah blah
and none of them want to help me out because well they just cbf
and i respect that so next time they need my help they wont get it ;)

iv got a donner sierra with a body lift in it and i want to take it out for my sierra.
so this is what im thinking undo all the body lift bolts and jack up the front and slide the body lift blocks out
then jack up the back take body lift blocks out
and then put the normal bolts out of my sierra into that one.

and then the same with my sierra but other way around.


so am i right if i am that sounds very easy so what are they going on about ?

sorry again if its been covered but i couldent find any body lift instructions
thanks

 Profile  

Offline
az supporter
az supporter
User avatar

Joined: Wed Nov 24, 2010 7:58 am
Posts: 11092
Location: Mandurah.W.A.
Vehicle: 84 LWB NT

Post Posted: Tue Feb 22, 2011 9:03 am 
Reply with quote Top  
Hey mate, that's the way all my mates have done their body lift's

_________________
Tell my arse, he actually gives a crap!

 Profile  

Offline
User avatar

Joined: Thu Nov 26, 2009 10:30 pm
Posts: 435
Location: Gladstone QLD
Vehicle: G16b 83

Post Posted: Tue Feb 22, 2011 9:08 am 
Reply with quote Top  
we had to undo the 2 bolts that attach the brake lines to the body in the engine bay

 Profile  

Offline
az supporter
az supporter
User avatar

Joined: Mon Dec 11, 2006 10:30 pm
Posts: 34842
Location: East Radelayed
Vehicle: SV420+SV620 Vitara's

Post Posted: Tue Feb 22, 2011 9:11 am 
Reply with quote Top  
this should give you a fair idea on how to remove & replace the bodylift... lots of pics, can be a one man job but the more help you can get the better.

http://www.outerlimits4x4.com/viewtopic ... =body+lift

i've bodylifted my vitara on my own, but had previously done it before.

_________________
You're just hating because you don't understand

 Profile WWW  

Offline
az supporter
az supporter
User avatar

Joined: Tue Oct 06, 2009 10:30 pm
Posts: 1475
Location: melbourne

Post Posted: Tue Feb 22, 2011 9:47 am 
Reply with quote Top  
link dident work for me :( not a member ?

thanks for every ones help
i was wondering that was all to it but now that i know it is, il give it a go

 Profile  

Offline
User avatar

Joined: Tue Jul 28, 2009 11:30 pm
Posts: 455
Location: Newcastle NSW
Vehicle: I drive your mum

Post Posted: Tue Feb 22, 2011 9:50 am 
Reply with quote Top  
salih wrote:
link dident work for me :( not a member ?

thanks for every ones help
i was wondering that was all to it but now that i know it is, il give it a go


Sign up then :lol: if thats Viclores how to then its a pretty good thread.

Layto....

 Profile  

Offline
az supporter
az supporter
User avatar

Joined: Mon Dec 11, 2006 10:30 pm
Posts: 34842
Location: East Radelayed
Vehicle: SV420+SV620 Vitara's

Post Posted: Tue Feb 22, 2011 9:51 am 
Reply with quote Top  
salih wrote:
link dident work for me :( not a member ?

thanks for every ones help
i was wondering that was all to it but now that i know it is, il give it a go


vicelore wrote:
VICELORES
91 sierra 2inch Body Lift Install write up.
Hello all give you a bit of background of my project I’m a 21 year old computer student now working in logistics as a category planner. With no prior knowledge about cars, except what I had read on the net. I Just bought a 91 WT sierra. Love it wanted a little more tyre clearance so decided to do this body lift. The kit I used was a superior engineering 2-inch lift. Cost me $370 shipped to vic. http://www.superiorengineering.com.au/p ... category=5
Thought I would put some words down on my experience with the process.
Was a extremely enjoyable process that took me and a mate who both had very little experience with cars about 16 hours total over a few days. But if I did it again now could get it done in about 5 hours.

Inspect the bolt’s location

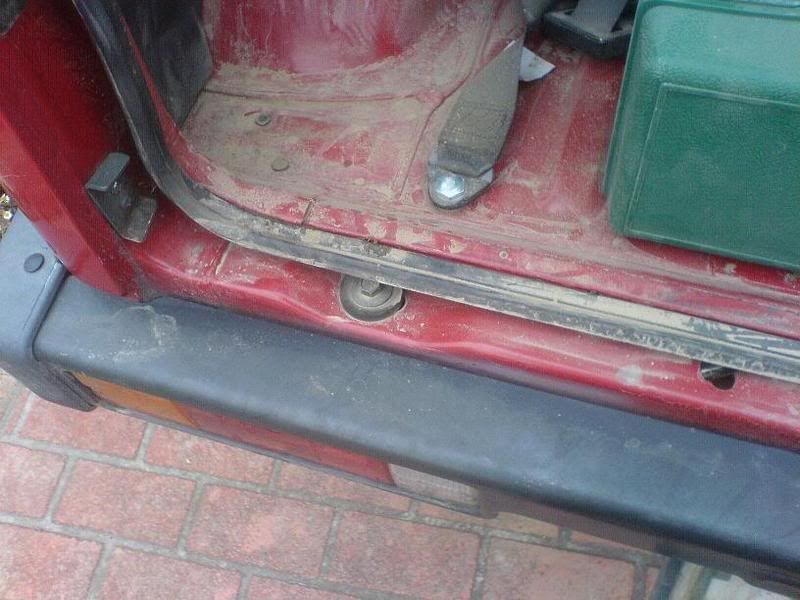
Not too much to explain here. Theres 2 up front 2 in the back and 6 under the car in the middle. 4 just behind the front seats and 2 under the front of the doors.
Image
Image

Remove front grill

All you need to do here is unscrew 5 screws out the front of the grill and give it a little pull from the middle of the grill.

Remove backlights loosen back bumper

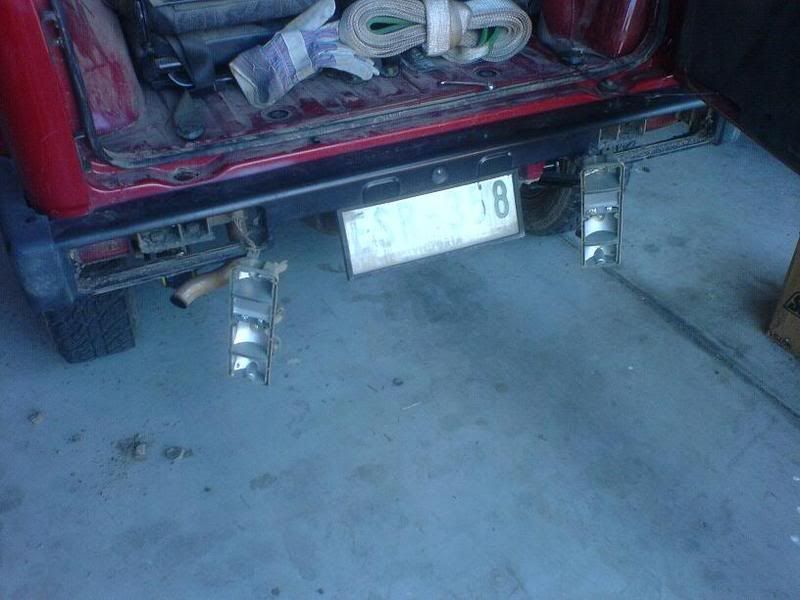
Ok you don’t really have to remove the lights but it makes it allot easier (and I highly recommend it). There is 8 screws holding in the back 2 light’s take them out.
This will allow you to check alignment at a later stage when lowering the body.
Also I would remove the 6 main bolts that hold the back bumper on as when I was raising the body, my bumper caught up on the number plate light brackets and lifted the back wheels off the ground and then eventually snapped off one of the lights and bent the crap out of the bracket. if your careful with this you may not need to remove the bumper but I would advise it . Made it allot easier.
Image

Remove front bolts

Pretty explanatory, just screw the 2 bolts up from the top. Be careful with the ratchet if u haven’t taken out the front head lights. As I didn’t.

Remove back bolts

2 back bolts are pretty much the same just attack them from the top, kinda hard to get to the bolt head so use a ring spanner until u get it up past the rubber.

Remove 6 middle nuts and lower bushings

There are 6 bolts under the car will be quite obvious how they come off remember to keep the factory rubbers and the steel washers and bolts.

Remove fuel filler bash plate

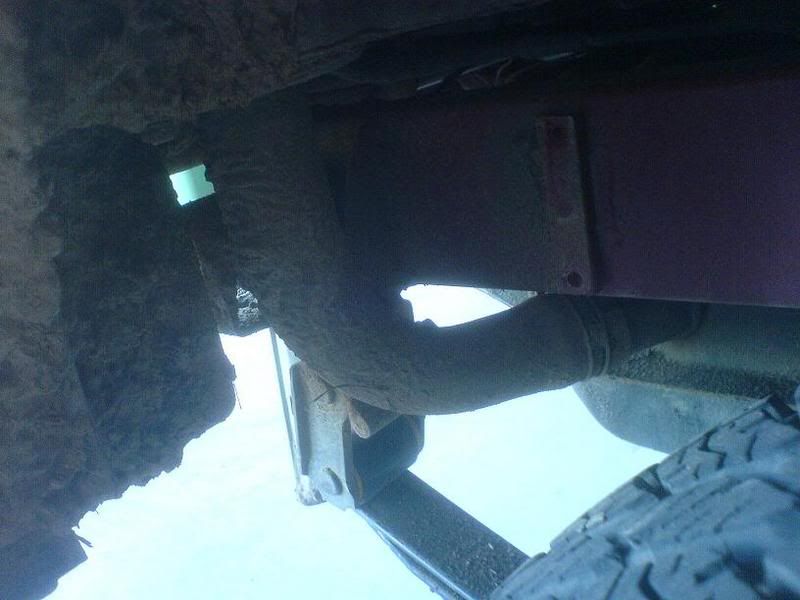
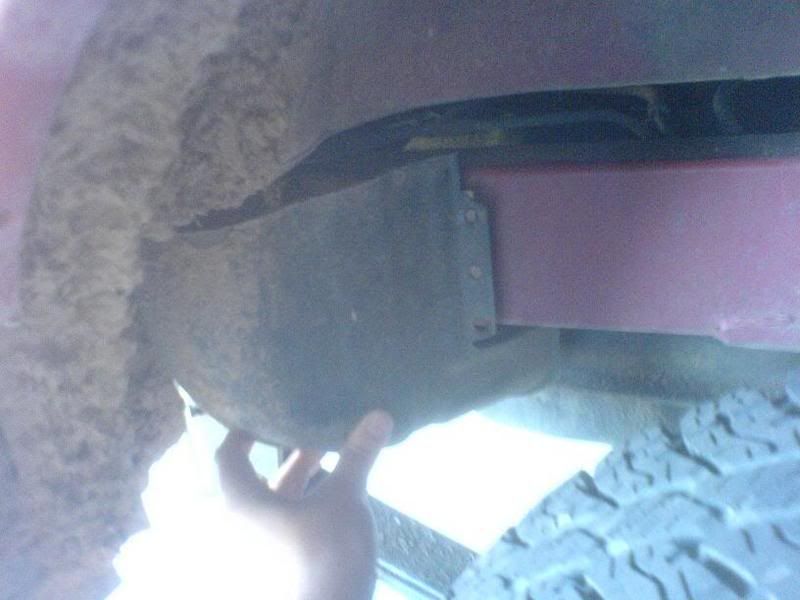
ok in the back right wheel arch there is a guard to protect the filler hose from stuff hitting it . has 3 bolts 2 into the chassis and 1 into the body. take them all off and remove the guard. ( I only used the chassis bolts when I placed the guard back on.) top one is pretty useless IMO.
Image
Image

Remove fuel filler guard (inside car)

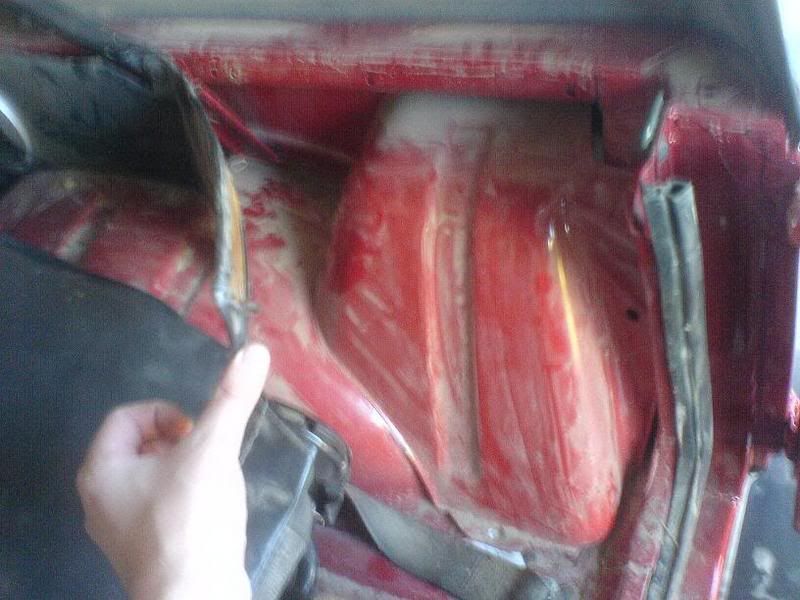
ok in the back of the car there is a steel guard over the fuel filler hose. has 3 bolts holding it in it needs to come off. Do this by pulling the trim off over it and removing 1 bolt that was holding a little bracket on over the trim. Ounce that’s off get the steel guard out.
Image
Image

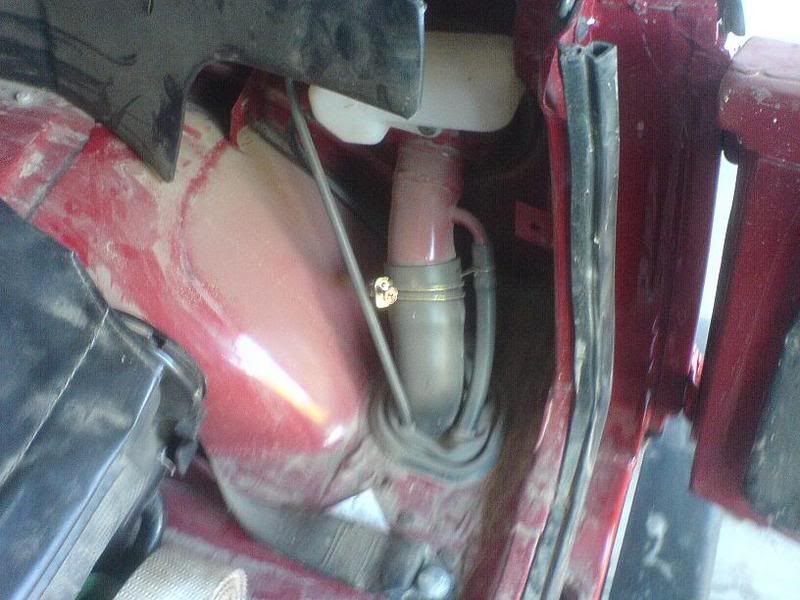
Loosen cable ties on fuel filler hose

Ok there's a cable the top of the fuel filler hose and one at the bottom ( in the wheel arch) both need to be loosened. I couldn't move the hose much until I actually started moving the body up. so I left that until the lift.

Remove handbrake bracket

Easy peazy this one 2 bolts under the back tray. Probably directly under the back 2 seats, remove them and let them hang.

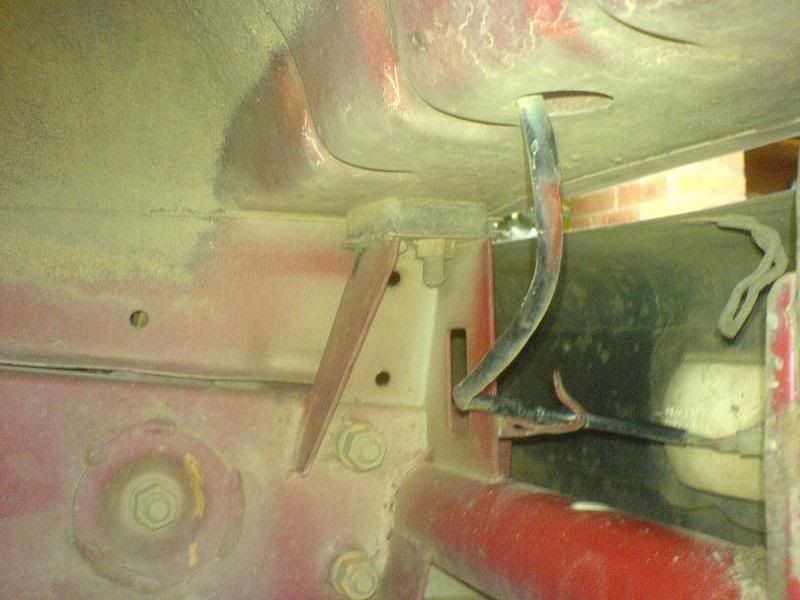
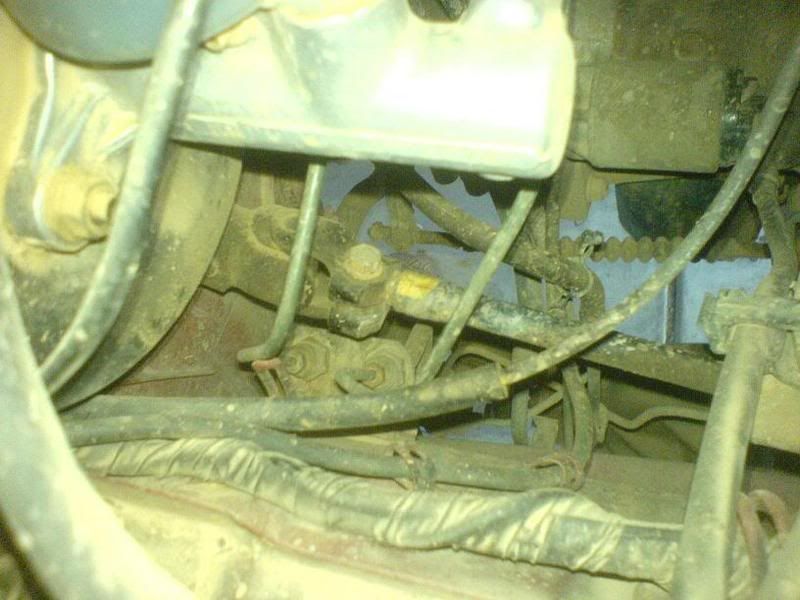
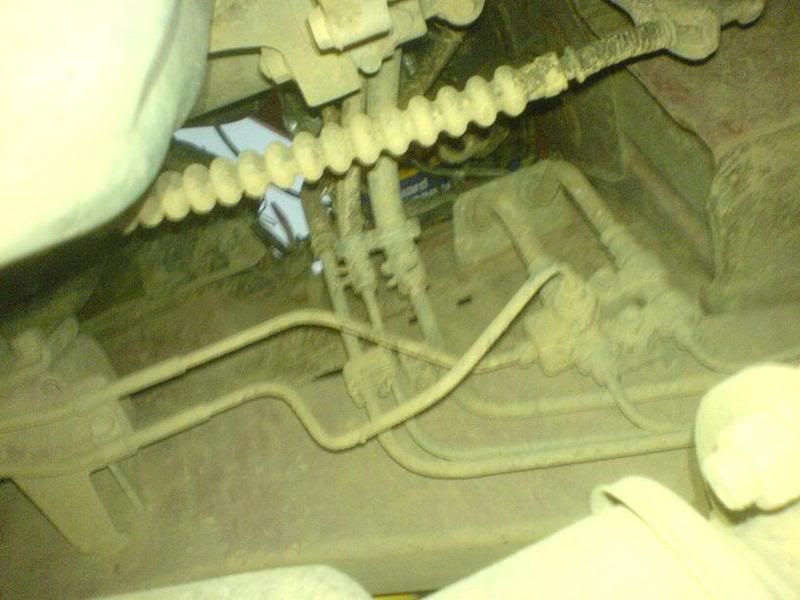
Remove brake line bracket

For this step you need to undo 2 bolts going into captive bolts welded onto a bracket inside the engine bay.
The bracket is under your battery, see pic. You need to undo the 2 bolts that go into the bracket, You can get to them from inside the front right wheel arch.
Ounce they are off let the bracket hang.
Image

Remove steering column

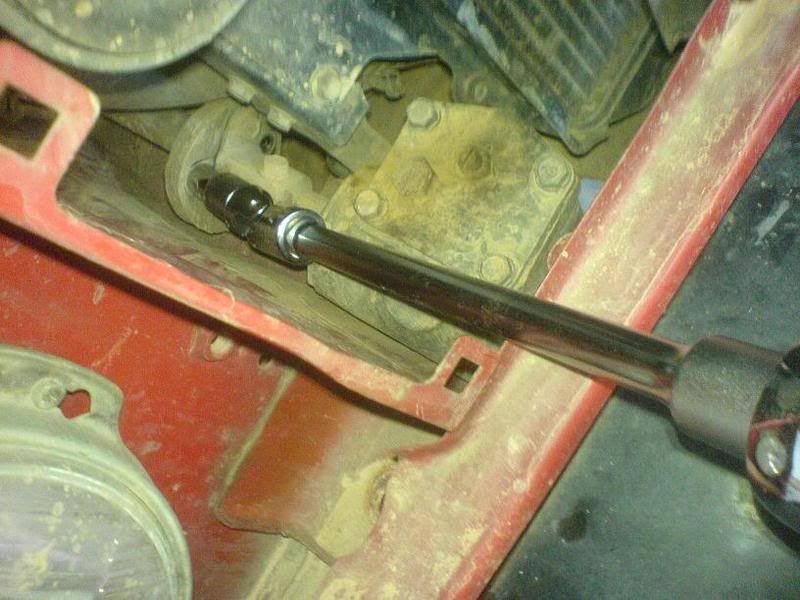
Ok fun stuff now. There are 2 bolts that go through the rag joint. (Rubber circle just before the steering box.) These need to come out and then there is a clamp up near the u joints (some dog bone thing up near the fire wall) see pic lol. Ounce that’s loose pull her out. Might be a little tight so don’t be scared to yank it out the clamp. (You will have to pull the bolt fully out the clamp to do this (well I had to).
Image
Image

Drill steering column plugs

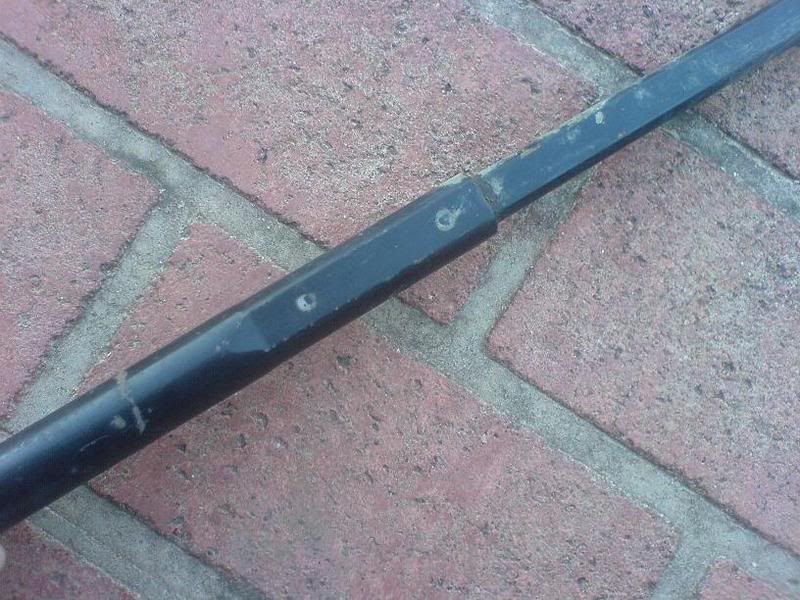
ok in the steering column there are 2 little plastic plugs that go about 3 mil into the shaft. they are around the middle of the shaft (on the square bit) see pic.
I just drilled the plugs out and lubed it up with some WD40.

Extend steering column spine

Ounce the plugs where out I gave it a bit with a hammer to move it in, and to move it out I inserted a screwdriver into the inner side of the shaft and hit it on the ground. Pushed the inner tube out fairly well. ( don’t be soft with this it can be quite stiff.)
Image
I have also read about people just putting a spacer on their rag joint. Or making another rag joint of the same size and using 2 to make up the extra length. I went away from this info because I didn’t have enough info on it.

Remove boot from around both gear sticks

Simple bit here 4 bolts around the main stick, 4 screws around the smaller gear stick.

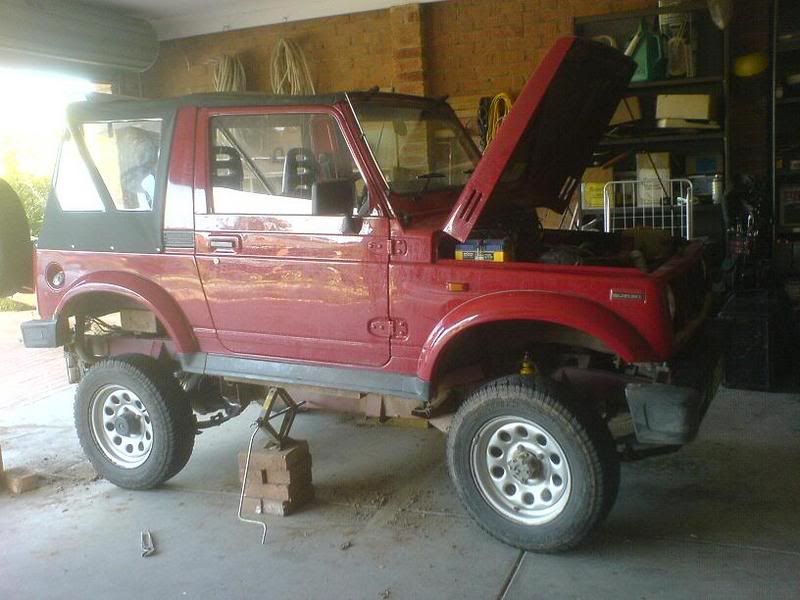
The lift itself

The lift itself wasn’t the hardest thing to do. Though I was working in a garage with 2 normal car jacks and a bunch of blocks. If trolley jacks where used I would say it would be allot easier. I used a piece of wood each side under the sill and the jack under that. You have to be careful you don’t catch the bracing next to the sills that connects to the chassis as u will lift up the back tyres with the body (like I did lol).
Image
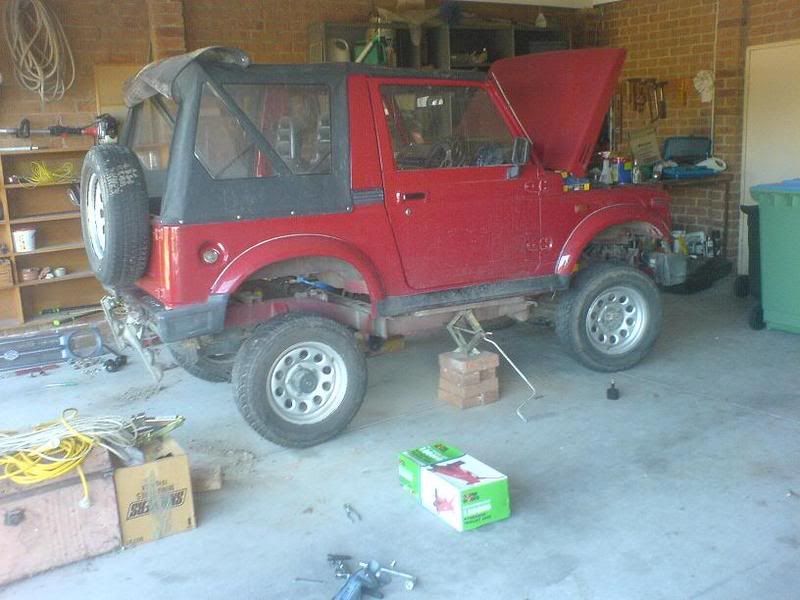
Take it slow when lifting and check for any tight cables or anything that could get pulled to tight.
I have herd that people only lift one side at a time. Install the blocks and do the other.
My blocks didn’t fit with just one side up in the air. So I had to lift both (probably not advised, as I had been told not to, but I saw no other option.)
The only thing I saw getting tight was the brake lines. But this ended up having enough stretch to get the blocks in.
Image

Screw on captive bolt extensions
Ok you just screw on the female bolts onto the captive 6 bolts under the body. i used lock tite on them (as i was advised to from the people who make the kit.)

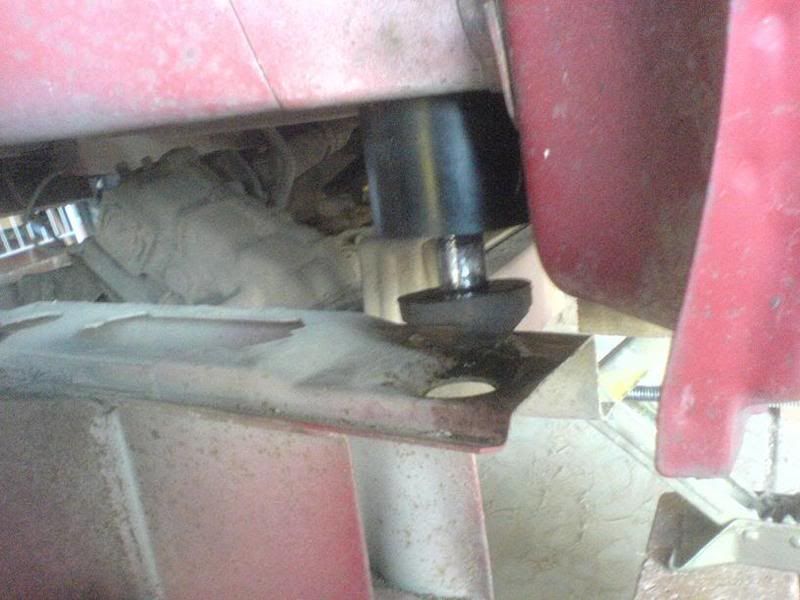
Place rubber blocks onto the captive bolts

Just press all the blocks on the captive bolts coming down from the body then lower a bit to take the tension off the brake lines.
Image

Place in front and back blocks

After this I re positioned front and back blocks with the bolts just sitting in through the holes. Without screwing them into the chassis captive nuts.

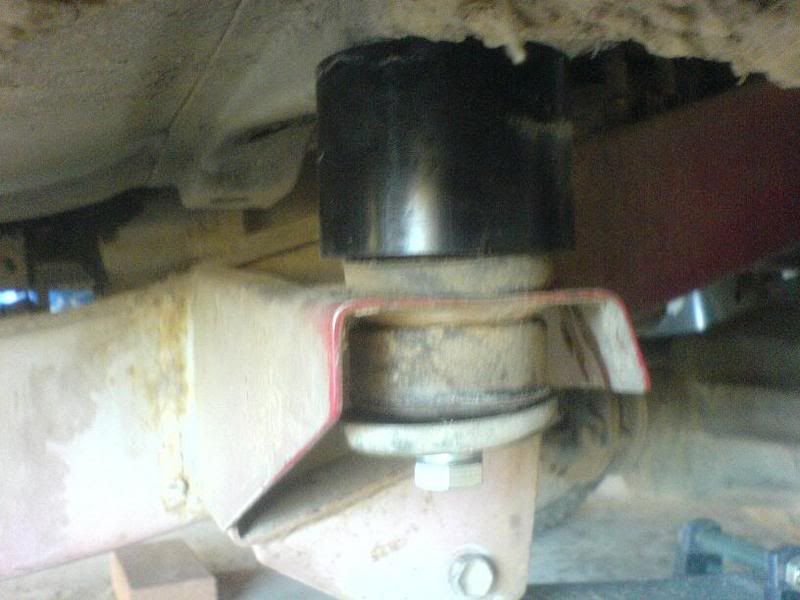
Place factory rubber bushings on after the blocks

Then I focused on the bushings that came off the car on the 6 middle bolts coming down from the body. I used a little lube on them and cleaned them off. The seemed to be in good condition so decided not to replace them (though I have heard it’s a good idea.)
Image
I pressed them onto the outside of the block. Was a tight fit but got them on. If they are too hard try lower the body onto them and they should squeeze on.

Lower body

After all 6 bushings are on lower the car a little more.

Check alignment

On its trip down keep checking alignment using all bolts. This would be easier fixed if u used trolley jacks but I ended up just pushing the body around on jacks. Bit dodgy but got away with it.

Insert front and back bolts

After your happy with the alignment and have check all middle bushings are fitting into there holes nicely. Its time to tighten the front and back bolts. Remembering to use washers. My kit came with replacement washers but they where fairly crappy so I replaced them with the original ones.

Place on factory bushings then screw in screws

Ok so now the cars back down on the chassis and the front and back bolts are all holding the body in place. Place the factory rubbers back on the bottom of the 6 middle bolts followed by the big steel washer things. And finally a bolt to hold it all in.

Tighten up all the removed pieces

Pretty self-explanatory put back on the fuel filler and the cover inside and bash guard. I didn’t extend the handbrake bracket though you probably could.

Reinstall Brake Bracket

Ok this was fun. The 2 holes that you took the bracket off is now way out of reach for the bracket, though there are 2 pre drilled square holes a little down and to the right I used one of these holes to reinstall the bracket and drilled another for the other bolt. ( I was told you can bend the hard break lines to make it reach around the steering column and make its way to the desired holes. ) Which I did. But was also told not to bed up near the master cylinder. Not a brake expert so do not take my word for it if you aren’t sure what you’re doing.

Install steering column

For this part pretty self explanatory , just reinstall the steering column can get a little tricky lining up the holes but a beer buddy will make the job easier as they can turn the steering wheel for you.
Final stuff.
After that’s done pretty much just put the lights back in and install the grill and reinstall the boots around the gear sticks. Have herd that you may need to enlarge the Trans hole a little. I didn’t have to.

Ok so I thought I would put down what I had learnt through the process. Please do not take my word for any thing because as stated I have no experience except this IF YOU DO NOT KNOW PLEASE ASK SOMEONE WHO DOES. Anyway`s I coudn`t find much info on the install so I thought I would put something down to help someone out if they are looking to do it.
Image

Cheers guys and keep up all the good work Outer limits.

PS if anyone has any changes that need to be done to this please PM me and ill do my best to update it.
Please feel free to add to the bible as its body lift section could use a update lol.

_________________
You're just hating because you don't understand

 Profile WWW  

Offline
User avatar

Joined: Mon Feb 14, 2011 8:19 am
Posts: 1966
Location: Couridjah
Vehicle: 1985 Holden Drover

Post Posted: Tue Feb 22, 2011 9:51 am 
Reply with quote Top  
Thats a weird registration page lol.

_________________
1989 WT Sierra.

 Profile WWW  

Offline
User avatar

Joined: Thu Mar 29, 2007 11:30 pm
Posts: 14498
Location: Here there everywhere
Vehicle: A manly awesome man jimny

Post Posted: Tue Feb 22, 2011 9:52 am 
Reply with quote Top  
sierras have 6 studs on the body not bolts so if your donor car has had the studs removed don't be tempted to copy it.

_________________
JEEPJEEPJEEPJEEPJEEPJEEPJEEPJEEPJEEP

 Profile  

Offline
User avatar

Joined: Mon Feb 14, 2011 8:19 am
Posts: 1966
Location: Couridjah
Vehicle: 1985 Holden Drover

Post Posted: Tue Feb 22, 2011 9:53 am 
Reply with quote Top  
Sorry to go a bit off topic guys, but i was thinking today whats the downside to a 2" lift with only spacers instead of new shocks/springs setup?

_________________
1989 WT Sierra.

 Profile WWW  

Offline
az supporter
az supporter
User avatar

Joined: Tue Oct 06, 2009 10:30 pm
Posts: 1475
Location: melbourne

Post Posted: Tue Feb 22, 2011 10:16 am 
Reply with quote Top  
thanks for that very help full


what do you have to change shocks after body lift i dident think you do ?

 Profile  

Offline
az supporter
az supporter
User avatar

Joined: Mon Dec 11, 2006 10:30 pm
Posts: 34842
Location: East Radelayed
Vehicle: SV420+SV620 Vitara's

Post Posted: Tue Feb 22, 2011 10:17 am 
Reply with quote Top  
salih wrote:
thanks for that very help full


what do you have to change shocks after body lift i dident think you do ?


no you don't need to change anything to do with the suspension

_________________
You're just hating because you don't understand

 Profile WWW  

Offline
User avatar

Joined: Thu Mar 29, 2007 11:30 pm
Posts: 14498
Location: Here there everywhere
Vehicle: A manly awesome man jimny

Post Posted: Tue Feb 22, 2011 10:25 am 
Reply with quote Top  
abclarke wrote:
Sorry to go a bit off topic guys, but i was thinking today whats the downside to a 2" lift with only spacers instead of new shocks/springs setup?


the body on my lwb is quite badly bent around the body mounts (25mm body lift) with a body lift you loose a heap of body support onto the chassis.
mine gets used hard on very rough roads though so is probably not the norm, hell
i stoved in the inner guards over my rear tyres with a big hammer so i could fit my 150ltr esky between the guards so whats a bit more body damage :D

_________________
JEEPJEEPJEEPJEEPJEEPJEEPJEEPJEEPJEEP

 Profile  

Offline
User avatar

Joined: Mon Feb 14, 2011 8:19 am
Posts: 1966
Location: Couridjah
Vehicle: 1985 Holden Drover

Post Posted: Tue Feb 22, 2011 10:30 am 
Reply with quote Top  
shep wrote:
abclarke wrote:
Sorry to go a bit off topic guys, but i was thinking today whats the downside to a 2" lift with only spacers instead of new shocks/springs setup?


the body on my lwb is quite badly bent around the body mounts (25mm body lift) with a body lift you loose a heap of body support onto the chassis.
mine gets used hard on very rough roads though so is probably not the norm, hell
i stoved in the inner guards over my rear tyres with a big hammer so i could fit my 150ltr esky between the guards so whats a bit more body damage :D


Haha thanks shep for the info. So a 2" body lift kit would be all good for general off roading? Or is it a waste of cash and to get a whole kit setup you think?

 Profile WWW  

Offline
az supporter
az supporter
User avatar

Joined: Tue Oct 06, 2009 10:30 pm
Posts: 1475
Location: melbourne

Post Posted: Tue Feb 22, 2011 10:40 am 
Reply with quote Top  
well if i had the cash yeah i wouled not go body lift i hate body lifts makes every thing look out of line.
but in the real world i dont have cash lol and my dooner car has a bl in it so yeah much cheaper for me.

 Profile  

Offline
User avatar

Joined: Thu Mar 29, 2007 11:30 pm
Posts: 14498
Location: Here there everywhere
Vehicle: A manly awesome man jimny

Post Posted: Tue Feb 22, 2011 10:43 am 
Reply with quote Top  
abclarke wrote:
shep wrote:
abclarke wrote:
Sorry to go a bit off topic guys, but i was thinking today whats the downside to a 2" lift with only spacers instead of new shocks/springs setup?


the body on my lwb is quite badly bent around the body mounts (25mm body lift) with a body lift you loose a heap of body support onto the chassis.
mine gets used hard on very rough roads though so is probably not the norm, hell
i stoved in the inner guards over my rear tyres with a big hammer so i could fit my 150ltr esky between the guards so whats a bit more body damage :D


Haha thanks shep for the info. So a 2" body lift kit would be all good for general off roading? Or is it a waste of cash and to get a whole kit setup you think?


i had one of just crusings bodylifts in my swb with no problems, i used to put the heavy stuff in a trailer when i had it.
Image

_________________
JEEPJEEPJEEPJEEPJEEPJEEPJEEPJEEPJEEP

 Profile  

Offline
User avatar

Joined: Mon Feb 14, 2011 8:19 am
Posts: 1966
Location: Couridjah
Vehicle: 1985 Holden Drover

Post Posted: Tue Feb 22, 2011 10:50 am 
Reply with quote Top  
Man that looks mad! Pretty much the look I'd want. Would that be ok offroad? Nothing serious just dirt tracks and a few hills prob.

 Profile WWW  

Offline
User avatar

Joined: Thu Mar 29, 2007 11:30 pm
Posts: 14498
Location: Here there everywhere
Vehicle: A manly awesome man jimny

Post Posted: Tue Feb 22, 2011 11:05 am 
Reply with quote Top  
it went well but not as awesome as a LWB :D
have a look at the start of my build thread cos the swb turned into my LWB
Image

_________________
JEEPJEEPJEEPJEEPJEEPJEEPJEEPJEEPJEEP

 Profile  

Offline
User avatar

Joined: Mon Feb 14, 2011 8:19 am
Posts: 1966
Location: Couridjah
Vehicle: 1985 Holden Drover

Post Posted: Tue Feb 22, 2011 6:23 pm 
Reply with quote Top  
Hey shep do you have the link for the page? Phone interwebs sucks nuts :P

_________________
1989 WT Sierra.

 Profile WWW  

Offline
User avatar

Joined: Mon Feb 14, 2011 8:19 am
Posts: 1966
Location: Couridjah
Vehicle: 1985 Holden Drover

Post Posted: Thu Feb 24, 2011 9:51 am 
Reply with quote Top  
Hey guys im pretty sure im picking up my sierra on sunday! And im thinking about doing the same body lift in the mean time until i get some more cash saved up! :D

_________________
1989 WT Sierra.

 Profile WWW  
Display posts from previous:  Sort by  
Post new topic Reply to topic  [ 20 posts ] 

Jump to:  


Who is online

Users browsing this forum: Google [Bot], Google Adsense [Bot], HarryHoudini and 745 guests

You cannot post new topics in this forum
You cannot reply to topics in this forum
You cannot edit your posts in this forum
You cannot delete your posts in this forum
You cannot post attachments in this forum
Untitled Document


Untitled Document


Powered by phpBB © 2000, 2002, 2005, 2007 phpBB Group :: Style based on FI Subice by phpBBservice.nl :: All times are UTC + 9:30 hours