| Author |
Message |
KEENSY85

Joined: Wed May 09, 2012 12:46 am Posts: 1742 Location: north brisbane
Vehicle: 1985 lwb sierra UTE

|
 Posted: Sun Oct 07, 2012 12:42 pm |
|
|
Still alive saved bird the other day to lol
|
|
|
|
|
DarkHorse
az supporter


Joined: Wed Apr 14, 2010 11:30 pm Posts: 5413
Vehicle: 08 SV650
|
Posted: Sun Oct 07, 2012 3:09 pm |
|
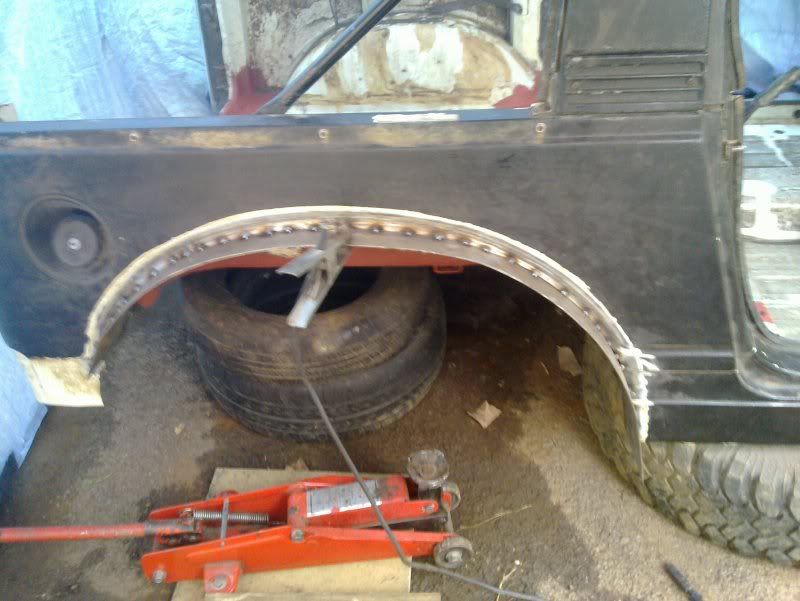
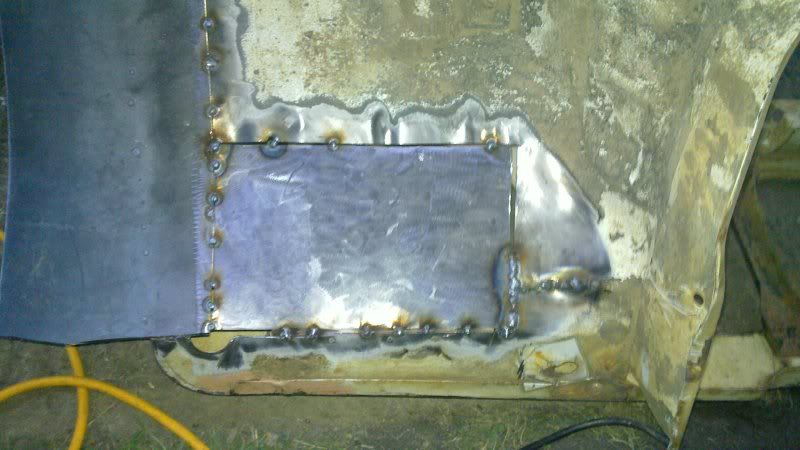
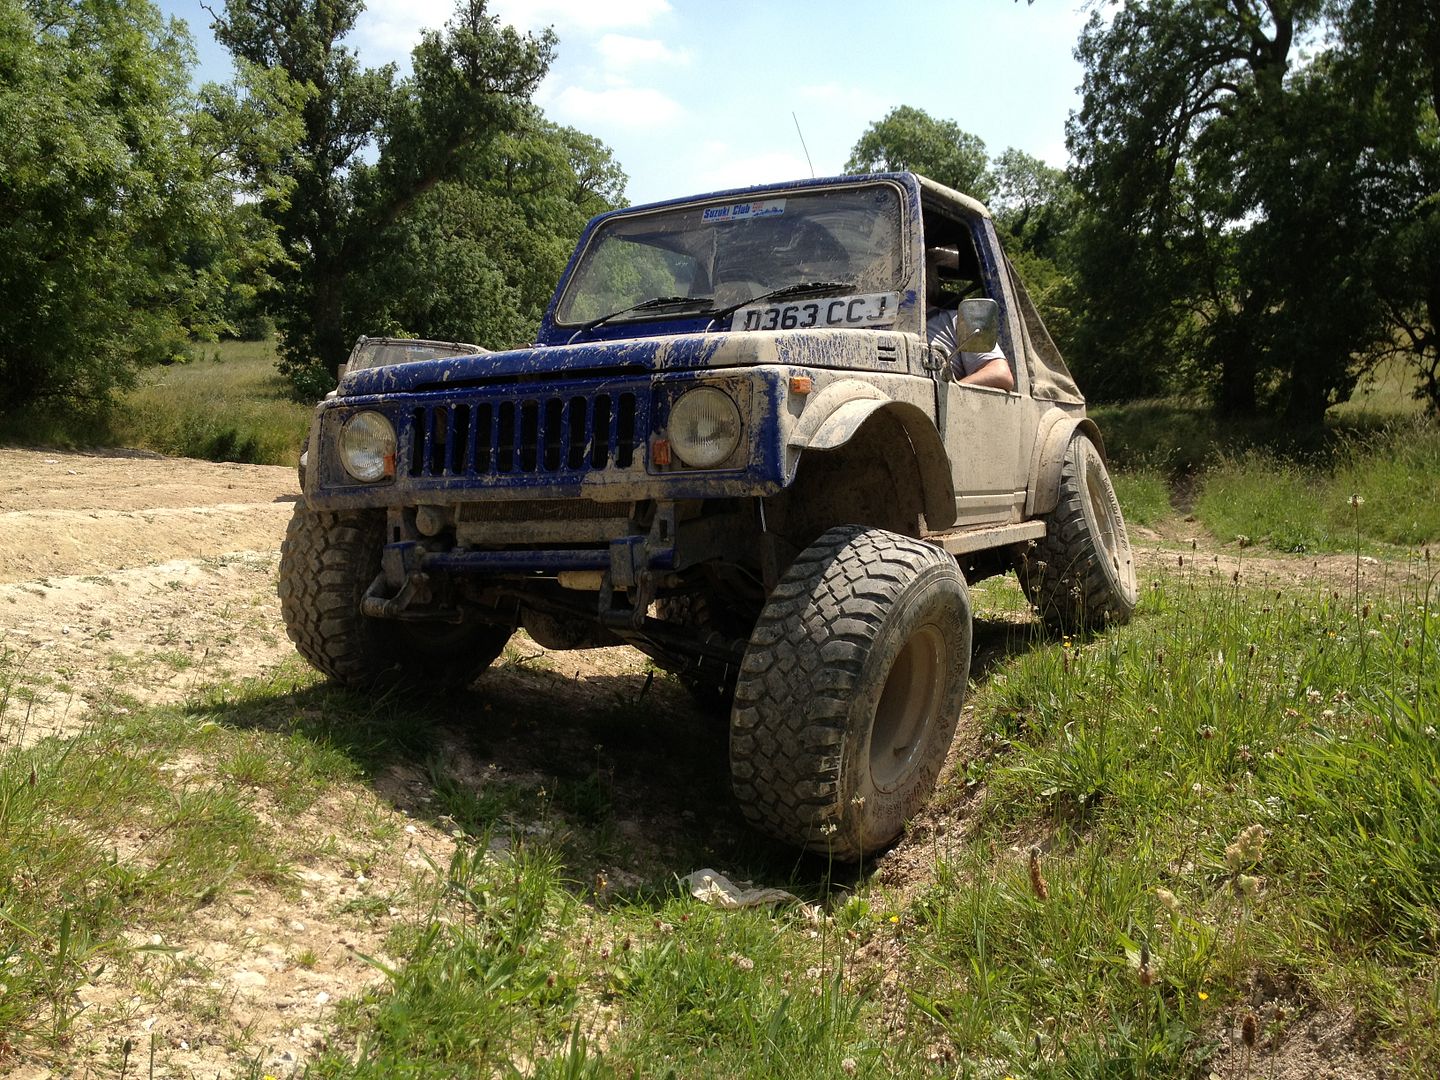
Bit of Vitara flavour to mix up this thread: I'm running 265/75/16 (32ish) on my LWB Vit, with about 3" of susp lift and 2" BL. Lift has pulled the rear axle close to the front edge of the guard, which I can't cut because it's less than an inch to the door. Solution - longer arms to move the diff back, and cut what I need out of the rear edge. What I didn't want was to hack half a foot out of the bumper, I don't like the way the big chop distorts the curve of the arch. Makes the cut obvious and is just a little inelegant for mine. I'm not trying to fit 35s in there (yet  ) so I didn't need to go that extreme. This what I was dealing with:  Inside the plastic bumper there is a steel panel that the mudflaps and inner guard bolts to. Behind that is a slightly more susbstantial panel that it part of the bumper structure. I decided to use this as a reference, as I could start to 'stretch' the curve from the black strip and end up with about an inch off at the bottom. Conveniently, I could leave the return of the steel in place and have something to screw the inner guard and flare to when done. Outside:  Inside showing the panels - white is the structure that I used as a guide, black is what got chopped:  Welded up:  Flare screwed back on:  Result:  Ride height:  Tyre just squeezes in: 
|
|
|
|
|
KEENSY85
Joined: Wed May 09, 2012 12:46 am Posts: 1742 Location: north brisbane
Vehicle: 1985 lwb sierra UTE
|
Posted: Mon Oct 08, 2012 8:43 am |
|
|
It's a pity there's no room on urs to take some off the sill as well
|
|
|
|
|
DarkHorse
az supporter
Joined: Wed Apr 14, 2010 11:30 pm Posts: 5413
Vehicle: 08 SV650
|
Posted: Mon Oct 08, 2012 11:59 am |
|
I took some of the mud shelf out, but yeah - door is too close to really do anything with that corner. 
|
|
|
|
|
KEENSY85
Joined: Wed May 09, 2012 12:46 am Posts: 1742 Location: north brisbane
Vehicle: 1985 lwb sierra UTE
|
Posted: Sat Oct 13, 2012 9:13 am |
|
|
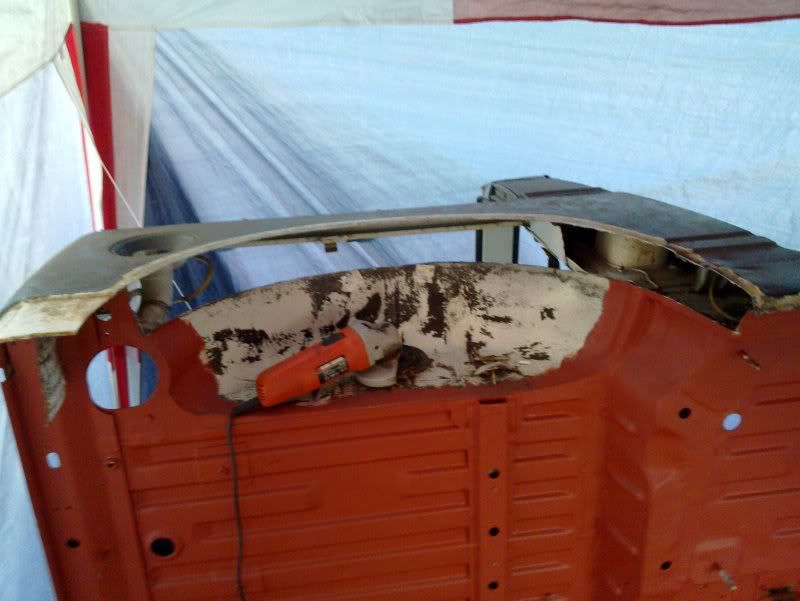
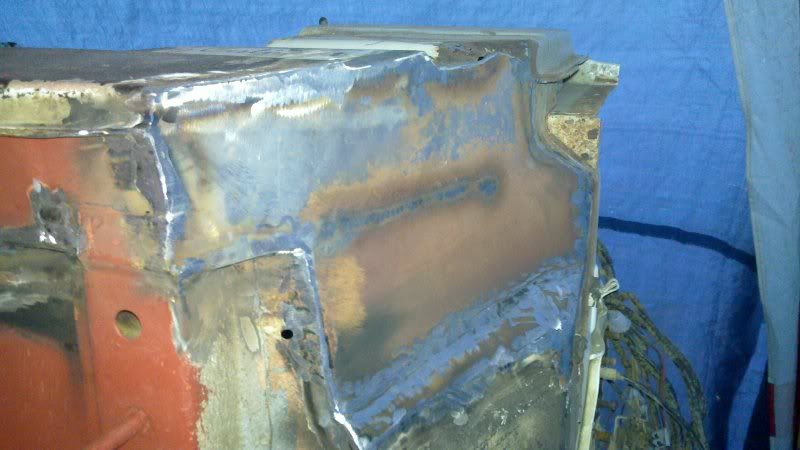
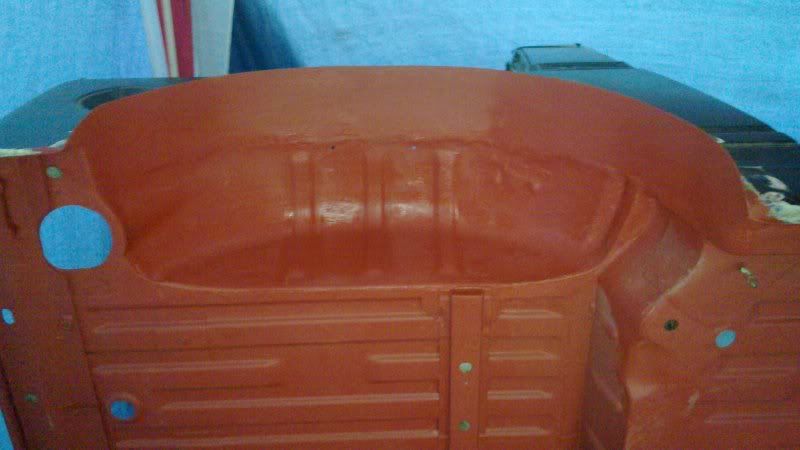
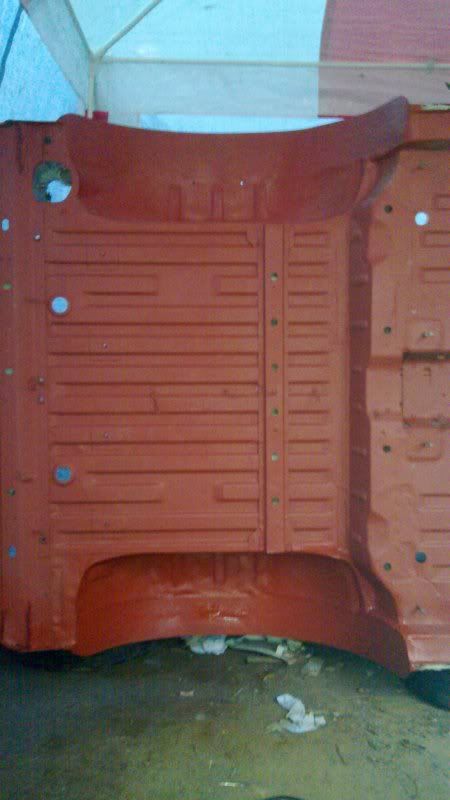
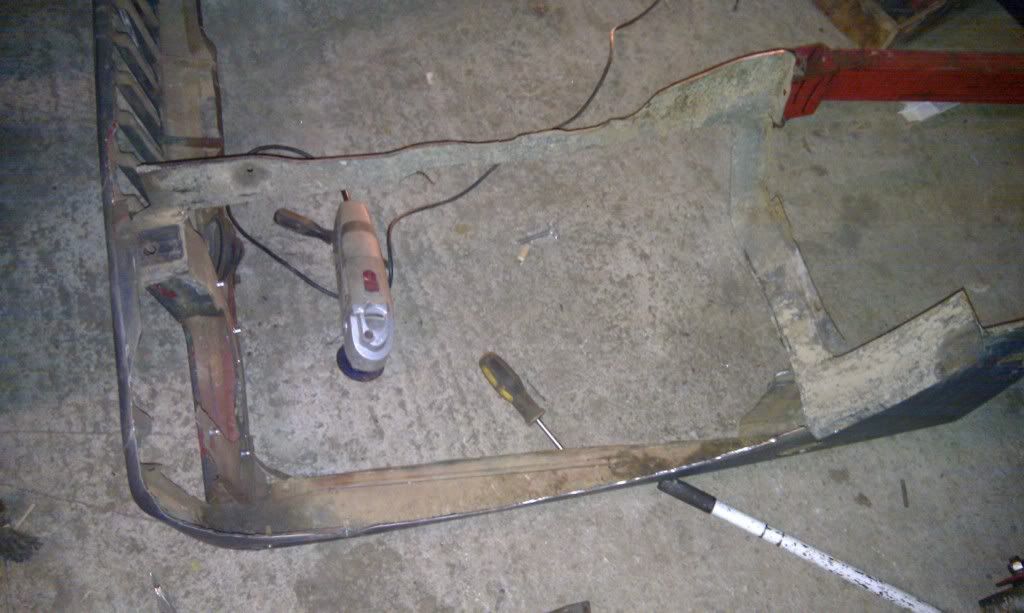
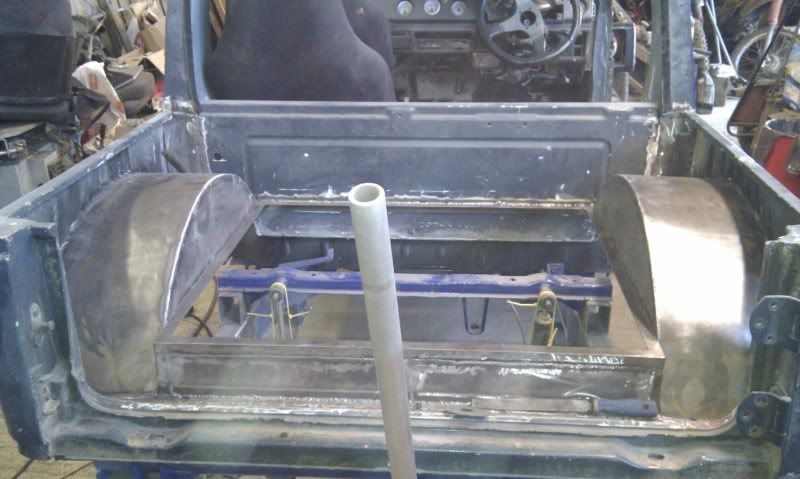
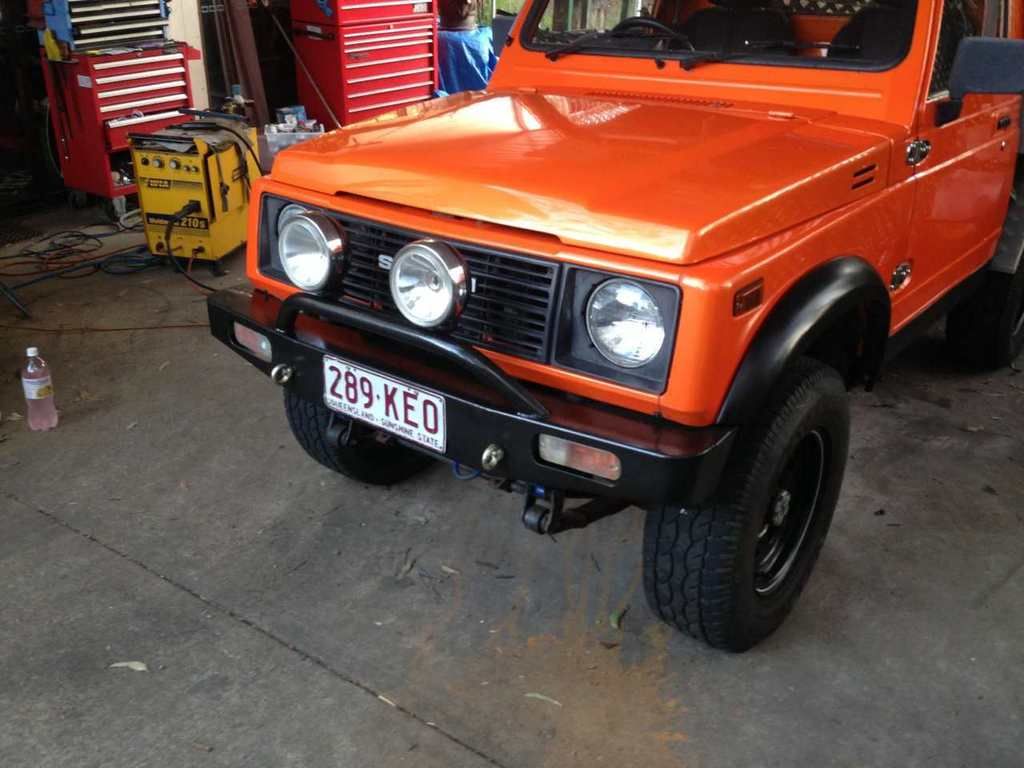
I did this yesterday it still looks a little rough but I Havn . Sprayed body deadener to seal it or anything and I still need drill some holes for drainage for water to escape from behind the headlight buket, only problem I have know is this front will probably only ever fit the front of this car as we're the rust is in the firewall ( in the curve in the wheel well iv brought it back to flat and chopped the sill by about 50 mm, so when gaurd will know bolt u to two extra bolts rather than just 1down the bottom above the sill. Any way I'm just starting to sound confusing so here's a pic
You do not have the required permissions to view the files attached to this post.
|
|
|
|
|
KEENSY85
Joined: Wed May 09, 2012 12:46 am Posts: 1742 Location: north brisbane
Vehicle: 1985 lwb sierra UTE
|
Posted: Thu Nov 01, 2012 7:25 pm |
|
|
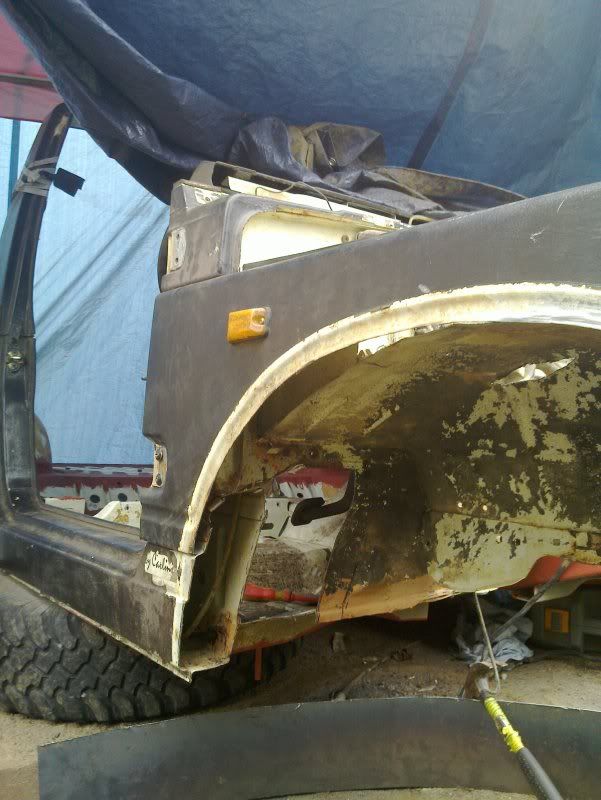
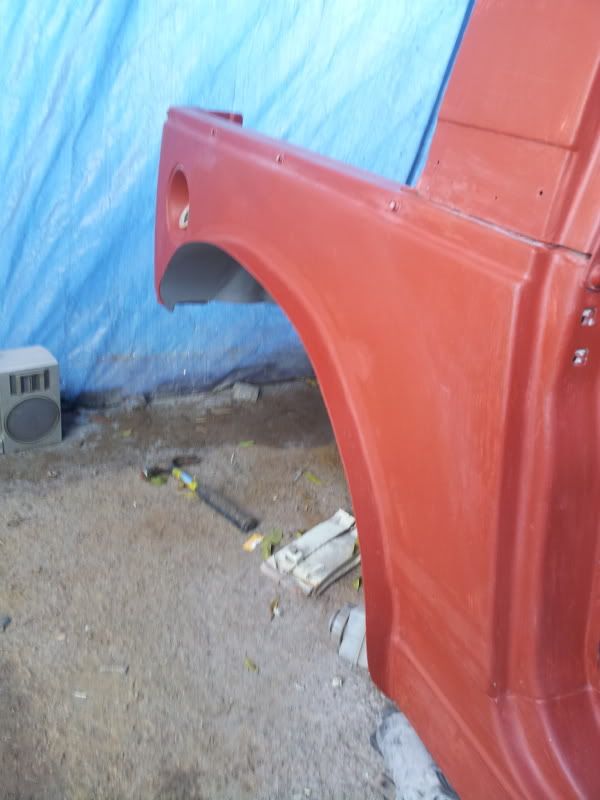
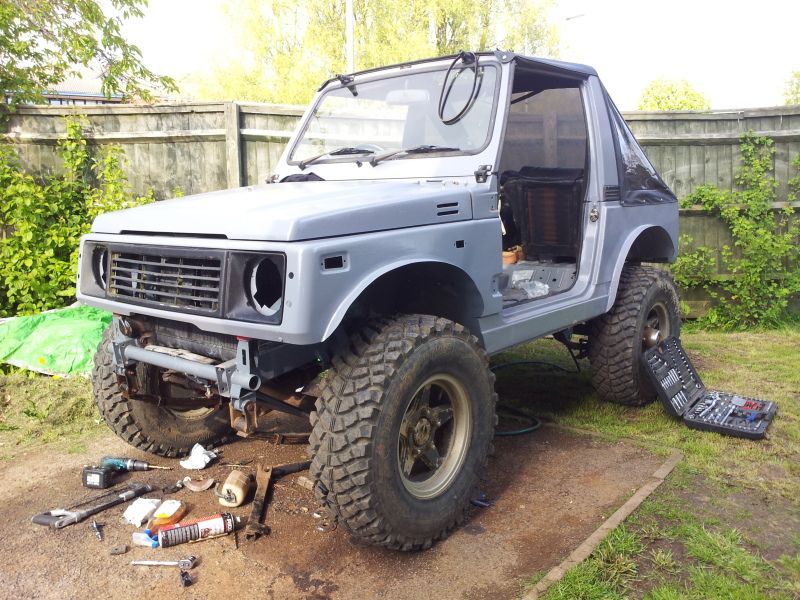
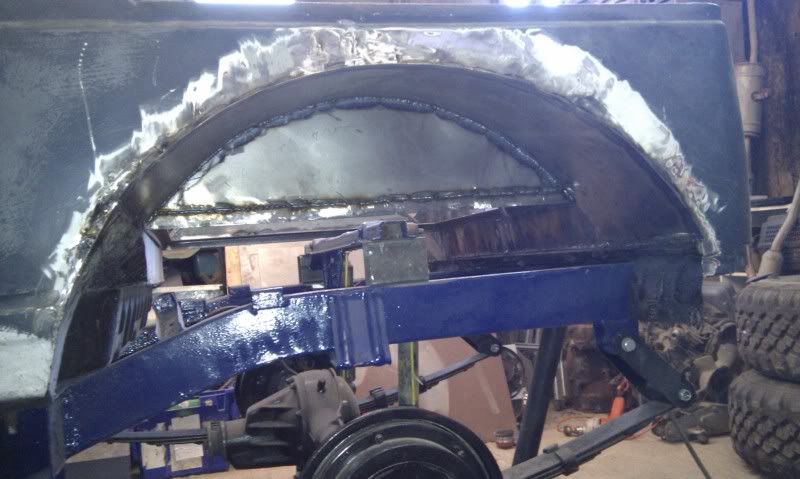
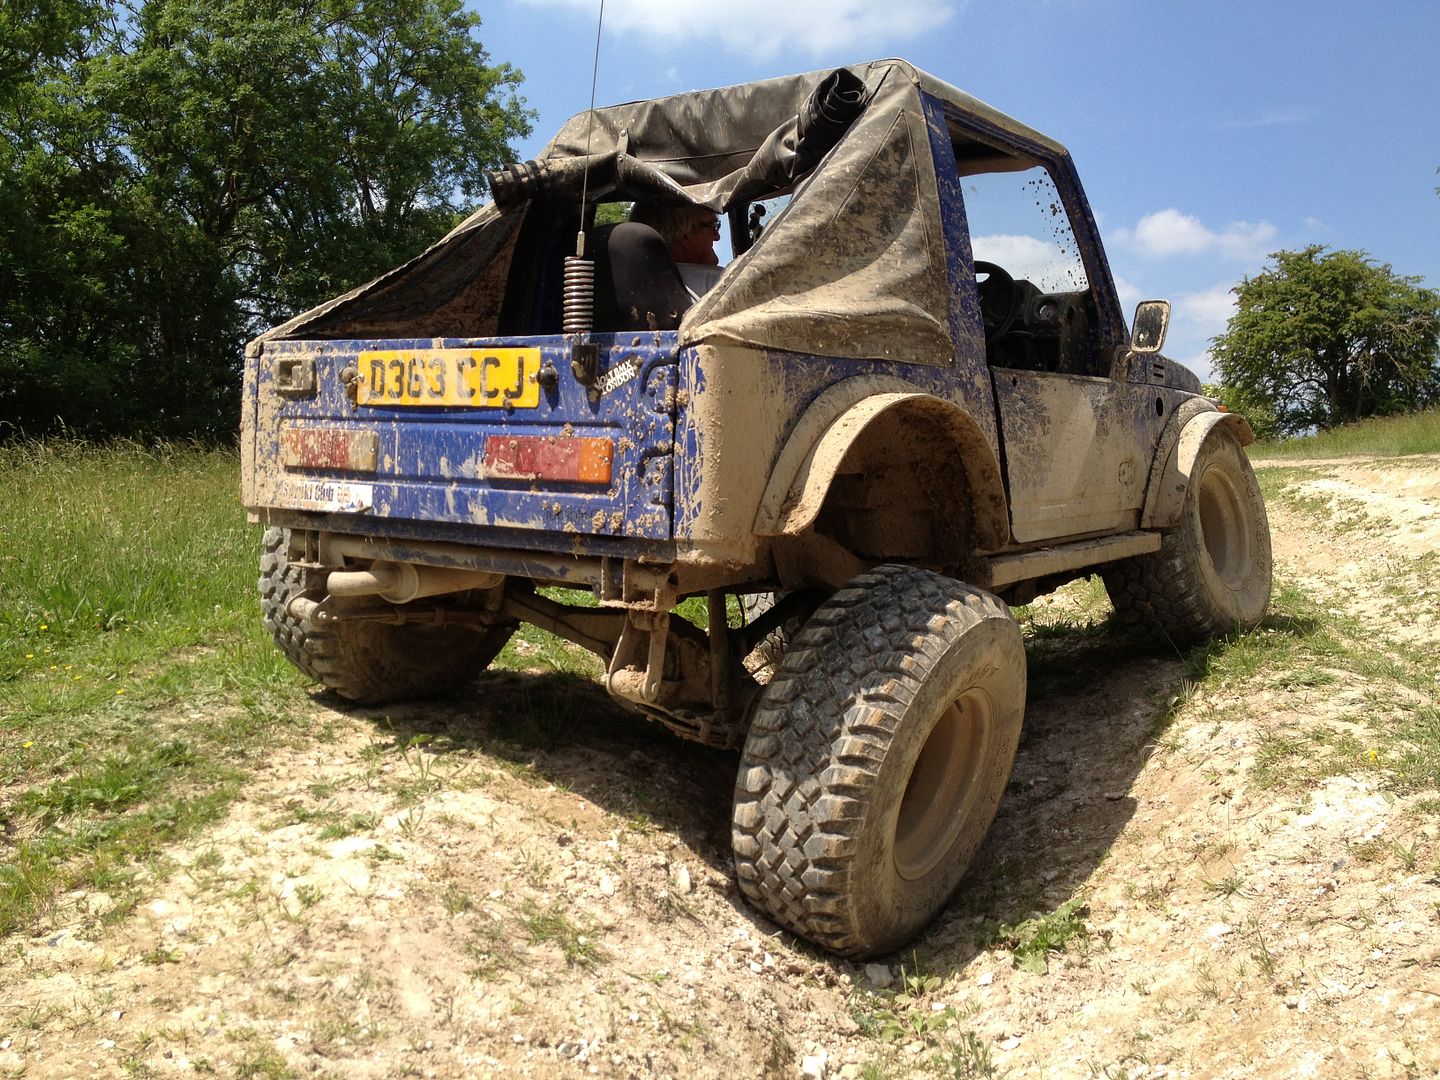
Here's the a pic with the wheel on (31'') and on new efs rears no body lift
You do not have the required permissions to view the files attached to this post.
|
|
|
|
|
pezz
az supporter
Joined: Fri May 15, 2009 11:30 pm Posts: 2108 Location: western vic
Vehicle: sj51
|
Posted: Thu Nov 01, 2012 7:40 pm |
|
|
|
|
KEENSY85
Joined: Wed May 09, 2012 12:46 am Posts: 1742 Location: north brisbane
Vehicle: 1985 lwb sierra UTE
|
Posted: Thu Nov 01, 2012 8:07 pm |
|
|
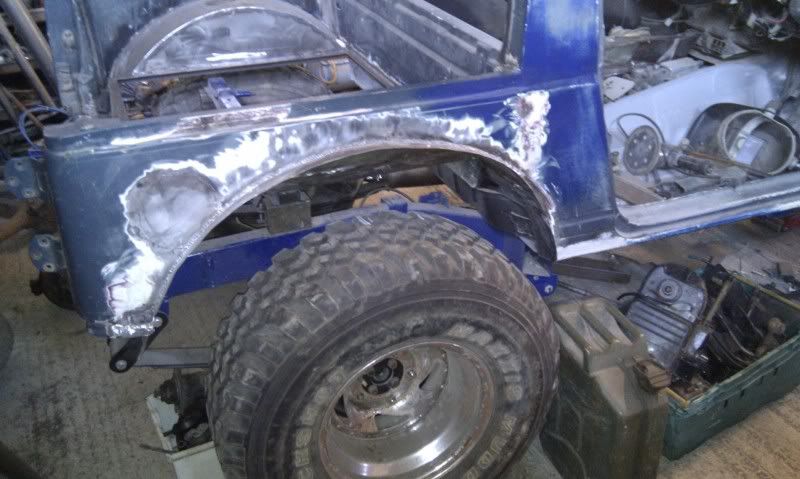
Any better?
You do not have the required permissions to view the files attached to this post.
|
|
|
|
|
95zook
az supporter
Joined: Mon Nov 12, 2012 10:16 pm Posts: 76 Location: South Brisbane
Vehicle: 95 sierra
|
Posted: Sun Nov 18, 2012 2:54 pm |
|
|
Is there anyone in Brisbane that does this kind of work, thinking about getting 31s on my sierra with a 2" lift but I don't have any welding knowledge
|
|
|
|
|
KEENSY85
Joined: Wed May 09, 2012 12:46 am Posts: 1742 Location: north brisbane
Vehicle: 1985 lwb sierra UTE
|
Posted: Tue Nov 20, 2012 8:55 pm |
|
|
It's very time consuming mate post up an add ask but be very carfull, or go see a panel beater but it will cost $$$$$$$$$$lotz unfortunately
|
|
|
|
|
KEENSY85
Joined: Wed May 09, 2012 12:46 am Posts: 1742 Location: north brisbane
Vehicle: 1985 lwb sierra UTE
|
Posted: Tue Nov 20, 2012 8:57 pm |
|
pezz wrote: bigger pic keens?   Or search my nt
|
|
|
|
|
slowsierra
Joined: Sat May 23, 2009 11:30 pm Posts: 415 Location: Greenbank, QLD
Vehicle: 89'SWBsierra&84'LWBsierra
|
Posted: Thu Jan 03, 2013 2:01 pm |
|
|
i am just about to start my virtual lift on the lwb sierra, just want to know what is the best way to cut it so i get a neat/even finish. i am going to do it the same way keensy85 did his and weld in sections. i am not to sure i will be able to cut it that neat with an angle grinder, what other options do i have
thanks greg
|
|
|
|
|
tanshi
az supporter

Joined: Tue Jan 09, 2007 10:30 pm Posts: 7719 Location: Brisbane
|
Posted: Thu Jan 03, 2013 2:04 pm |
|
|
|
|
KEENSY85
Joined: Wed May 09, 2012 12:46 am Posts: 1742 Location: north brisbane
Vehicle: 1985 lwb sierra UTE
|
Posted: Thu Jan 03, 2013 2:20 pm |
|
|
Get ur grinder out and practice on some scrap material cutting shapes out I just took my time and followed the existing line and I used a skinny cutting discount once u weld ur new material in it kinda tidys up the slight imperfections from when u cut, oh and see my pic of the rear wheel?
Make sure u bolt ur wheels on to see how it looks iv got to take more out of the sill to make it look more natural
|
|
|
|
|
shakes

Joined: Sat Apr 10, 2010 11:30 pm Posts: 4895 Location: Northcote
|
Posted: Thu Jan 03, 2013 6:37 pm |
|
|
grinder is far too harsh plus will burn little metal fragments into your paint = rust.
Sierra panels are paper thin, tin snips all the way. Do take KEENSY85's info on following the bodylines.
|
|
|
|
|
Fatzook
az supporter

Joined: Sat Oct 27, 2007 11:30 pm Posts: 14977 Location: The Hills
Vehicle: Vitara, NGV
|
Posted: Thu Jan 03, 2013 6:48 pm |
|
|
I've done 4 virtual lifts with a grinder now. If you know how to use one, it is just as effective as a jigsaw, but far easier and quicker. Tin snips are for roof sheets. Not panel work.
_________________
2013 GV
1998 SV420 ute
|
|
|
|
|
KEENSY85
Joined: Wed May 09, 2012 12:46 am Posts: 1742 Location: north brisbane
Vehicle: 1985 lwb sierra UTE
|
Posted: Thu Jan 03, 2013 8:08 pm |
|
shakes wrote: grinder is far too harsh plus will burn little metal fragments into your paint = rust.
Sierra panels are paper thin, tin snips all the way. Do take KEENSY85's info on following the bodylines. Sorry mate I disagree its not that thin man u can even weld the stuff. I don't even think I could cut it as good using tin snips or a jigsaw. If ur not comfortable using the grinder for it, practice makes perfect 
|
|
|
|
|
DarkHorse
az supporter
Joined: Wed Apr 14, 2010 11:30 pm Posts: 5413
Vehicle: 08 SV650
|
Posted: Thu Jan 03, 2013 10:02 pm |
|
|
|
|
scottiej

Joined: Thu Nov 11, 2010 11:53 am Posts: 50 Location: UK
|
Posted: Fri Jan 04, 2013 2:04 am |
|
Last edited by scottiej on Fri Aug 02, 2013 6:12 pm, edited 1 time in total.
|
|
|
|
|
KEENSY85
Joined: Wed May 09, 2012 12:46 am Posts: 1742 Location: north brisbane
Vehicle: 1985 lwb sierra UTE
|
Posted: Fri Jan 04, 2013 4:54 am |
|
|
|
|
shakes
Joined: Sat Apr 10, 2010 11:30 pm Posts: 4895 Location: Northcote
|
Posted: Fri Jan 04, 2013 6:35 pm |
|
KEENSY85 wrote: shakes wrote: grinder is far too harsh plus will burn little metal fragments into your paint = rust.
Sierra panels are paper thin, tin snips all the way. Do take KEENSY85's info on following the bodylines. Sorry mate I disagree its not that thin man u can even weld the stuff. I don't even think I could cut it as good using tin snips or a jigsaw. If ur not comfortable using the grinder for it, practice makes perfect I get to use grinders and welders in some pretty damn sensitive area's. Depending on the material, mechanical cutting means are usually used, funnily enough I'm pretty damn handy with tin snips. Can get a quicker and neater cut with a good pair of tin snips. It wont need to be filed, the material will be as uniform as a sierra panel thickness gets, you wont overheat and warp the panel from getting over enthusiastic. Not everyone thinks about the spray from a grinder and not everyone works in a space where a grinder is practical. I don't disagree if you have the skill's/space/knowledge that its a bad thing. I'm pretty damn jaded from dealing with fuckwits all day today in the heat down here so my view of society is pretty low at the moment.. I don't see why you need to wave your dick about my skillset or ideas?
|
|
|
|
|
scottiej
Joined: Thu Nov 11, 2010 11:53 am Posts: 50 Location: UK
|
Posted: Fri Jan 04, 2013 11:30 pm |
|
KEENSY85 wrote: Well cool nice pics Thanks.
|
|
|
|
|
Teracis
Joined: Sat Dec 11, 2010 10:03 pm Posts: 2261 Location: Gold Coast
Vehicle: Daisy
|
Posted: Sat Jan 05, 2013 8:04 am |
|
|
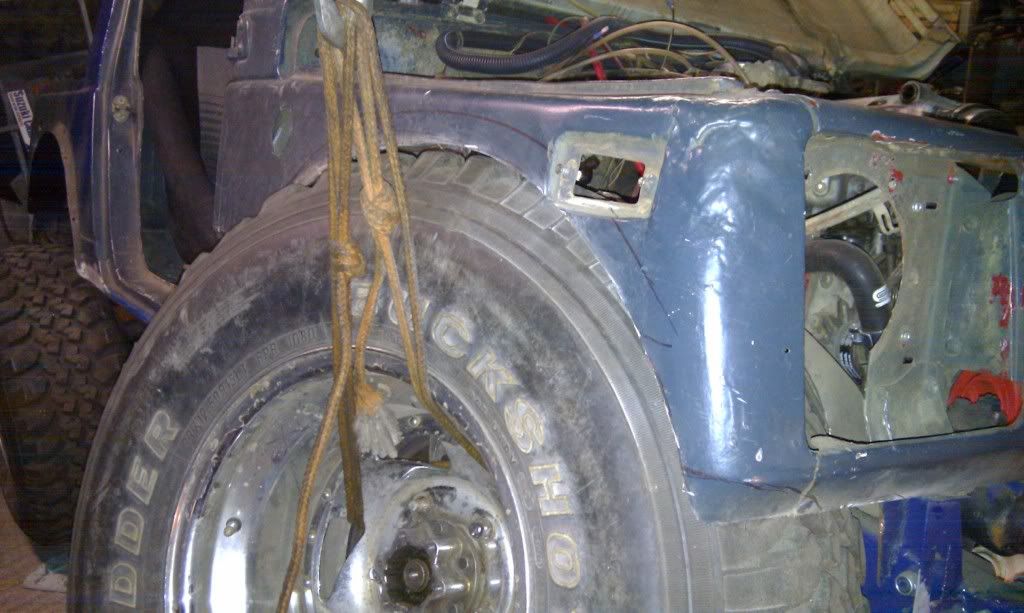
Meanwhile scottiej, second last pic you have the shackle pin going through the bolt hole in the chassis, clever idea, how does it go wear and tear wise?
|
|
|
|
|
KEENSY85
Joined: Wed May 09, 2012 12:46 am Posts: 1742 Location: north brisbane
Vehicle: 1985 lwb sierra UTE
|
Posted: Sat Jan 05, 2013 5:46 pm |
|
Teracis wrote: Meanwhile scottiej, second last pic you have the shackle pin going through the bolt hole in the chassis, clever idea, how does it go wear and tear wise? Yep man what he said u got a build thread or something
|
|
|
|
|
scottiej
Joined: Thu Nov 11, 2010 11:53 am Posts: 50 Location: UK
|
Posted: Sun Jan 06, 2013 6:03 am |
|
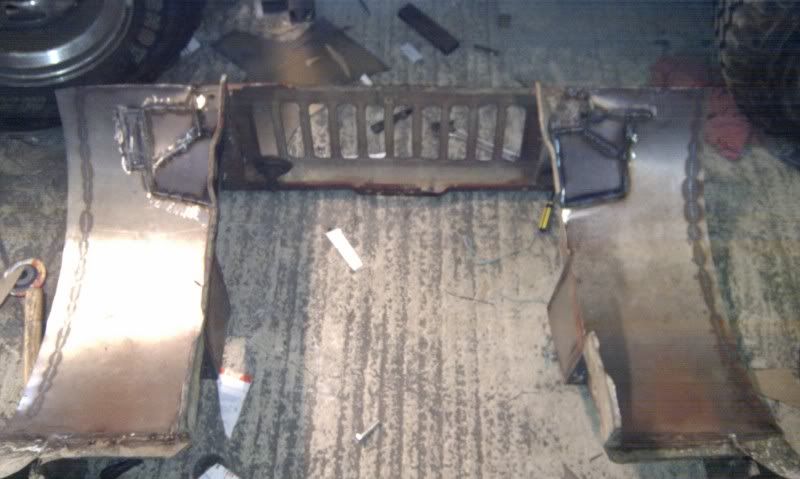
They are some bolt on chassis extensions I built for the YJ conversion, if you look closely you can see the lower bolt behind the shackle bolt, there are YJ bushes in the extensions. They are kind've like the bolt on ruf shackle hangers 2stroker makes but they bolt onto the outsides of the chassis rails to match the YJ spring width. I also drilled the mounting holes out to 12mm and sleeved the chassis to that it doesn't crush and for extra strength. Here's my thread on zukikrawlers, The build thread on my forum is 43pages long  this ones a bit shorter http://www.zukikrawlers.com/showthread.php?t=47414But if you do want to see everything from start to finish here's the long one  http://www.suzukiclubuk.co.uk/forum1/vi ... f,22/t,12/ http://www.suzukiclubuk.co.uk/forum1/vi ... f,22/t,12/
|
|
|
|
|
slowsierra
Joined: Sat May 23, 2009 11:30 pm Posts: 415 Location: Greenbank, QLD
Vehicle: 89'SWBsierra&84'LWBsierra
|
Posted: Sun Feb 03, 2013 3:53 pm |
|
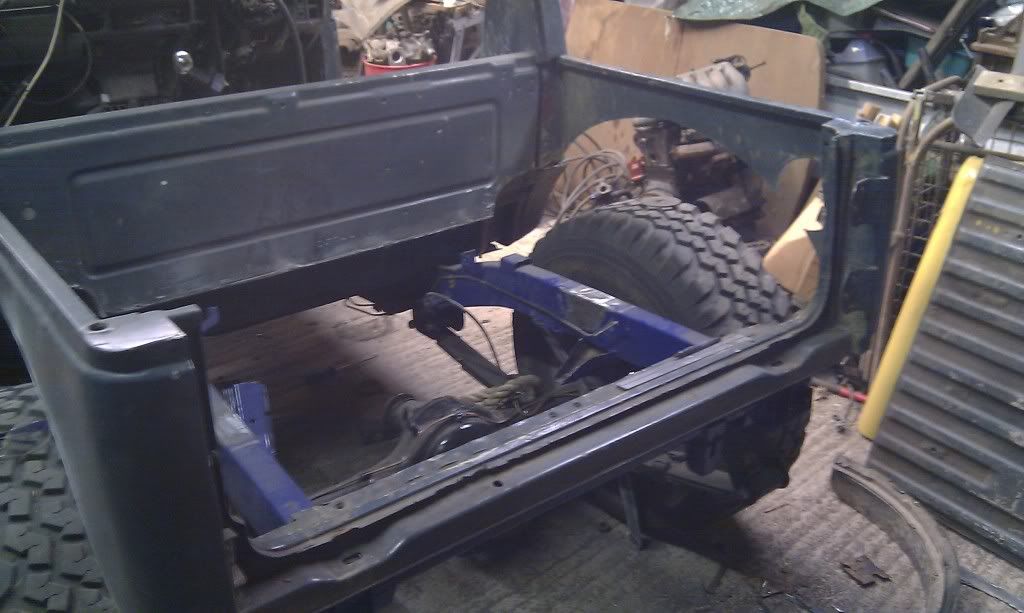
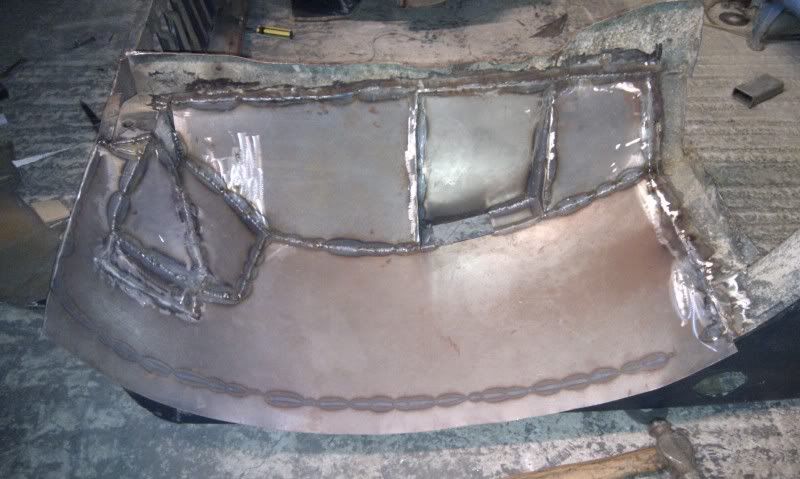
i have just started cutting the guards for the virtual lift. the pics below are of the drivers side front guard. i was just wanting to know what you guys did with these bits that hang down. does it look like i am doing the right thing?    any feed back or tips are welcome thanks greg
|
|
|
|
|
gvzookdriver
az supporter

Joined: Mon Apr 13, 2009 11:30 pm Posts: 1833 Location: Brisbane
Vehicle: Sold zuk got a Bt50
|
Posted: Sun Feb 03, 2013 4:21 pm |
|
|
Hammer time. Also did you check to see if your tyres clear the front of the clip under the headlights. Remember dont weld the front clip to the body.
_________________
bt50 now but still love the zooks
|
|
|
|
|
slowsierra
Joined: Sat May 23, 2009 11:30 pm Posts: 415 Location: Greenbank, QLD
Vehicle: 89'SWBsierra&84'LWBsierra
|
Posted: Sun Feb 03, 2013 4:57 pm |
|
|
thanks GV. yeah i checked it should clear the head light
|
|
|
|
|
KEENSY85
Joined: Wed May 09, 2012 12:46 am Posts: 1742 Location: north brisbane
Vehicle: 1985 lwb sierra UTE
|
Posted: Sun Feb 03, 2013 6:31 pm |
|
|
Yer spot on like gv said bolt ur wheels on and see if all tyrs clear and look good
|
|
|
|
|
Teracis
Joined: Sat Dec 11, 2010 10:03 pm Posts: 2261 Location: Gold Coast
Vehicle: Daisy
|
Posted: Mon May 06, 2013 4:59 pm |
|
|
I'm in the middle of a guard chop at the moment, build thread will be updated with pics soon, this thread is great for ideas and information, I'll link the post in my build here for anyone else to see more pics!
|
|
|
|
|
|